Quick answer: Buy stamps made from tool steel hardened to 60–65 HRC, sized by impression height — from 1mm for delicate jewellery up to 6mm for larger work. Stamp only annealed, non-ferrous metals such as silver, gold, copper and brass, supported on a solid steel bench block, using one firm strike. Never strike hardened steel — it will chip or shatter the punch.
A Permanent Mark of Identity
Leaving a mark on your work is a tradition as old as craft itself. It is a declaration of origin, a stamp of authenticity, and a signature that connects the maker to the object. For jewellers, knife-makers, leather workers, and artisans of all disciplines, the metal punch stamp is the primary tool for this purpose. It provides a simple, permanent, and effective method for adding identity, decorative details, or essential information to a finished piece.
Choosing the right stamp, however, involves more than picking a design. Understanding the technical specifications of the tool, the material it will be marking, and the correct technique for its use is fundamental to achieving a crisp, professional result. This guide covers the essential knowledge for selecting and using metal punch stamps in a UK workshop context.
Understanding the Anatomy of a Metal Punch Stamp
At its core, a punch stamp is a simple tool: a hardened steel rod with a design engraved in reverse on its tip. However, the details of its construction have a significant impact on its performance and usability.
Shank Shape and Grip
The body of the stamp is called the shank. Shanks are typically either square or round in profile.
- Square shanks offer four flat faces. This geometry prevents the tool from rolling off the bench and can assist in visual alignment, as the flat sides provide a clear reference against a straight edge. Many makers find them easier to hold steady.
- Round shanks can be rotated smoothly in the fingers, which some users prefer for micro-adjustments just before striking. Their tendency to roll is a minor inconvenience that is easily managed with proper bench organisation.
Many stamps feature a knurled section on the shank. This textured, cross-hatched pattern provides a secure grip, even with dusty or slightly oily hands. A good grip is essential for safety and accuracy, as it prevents the stamp from shifting during the critical moment of impact.
Tip Size and Impression
Stamp sizes are specified by the height of the impression they create, measured in millimetres (mm). A stamp advertised as '3mm' will produce a character or design that is 3mm tall. It does not refer to the dimensions of the steel shank. Common sizes range from a tiny 1mm, suitable for delicate jewellery or watch components, up to 6mm or even larger for marking industrial parts or substantial leather goods. The choice of size should be proportional to the object being marked; a large mark on a small earring would be overwhelming, while a tiny mark on a large belt buckle would be lost.
Steel Hardness
This is arguably the most important technical specification. For a stamp to make an impression in metal, it must be significantly harder than the target material. The hardness of steel is measured on the Rockwell C scale (HRC). A quality metal punch stamp is typically made from high-carbon tool steel and hardened to between 60 and 65 HRC. This level of hardness ensures the tip remains sharp and undeformed after hundreds of strikes on softer metals like silver, copper, and aluminium. A poorly hardened stamp will quickly become dull, producing blurred impressions, or even chip and fracture, which is a safety hazard.
Types of Metal Punch Stamps
Stamps are available for a wide variety of applications, from basic identification to complex legal requirements.
Letter and Number Sets
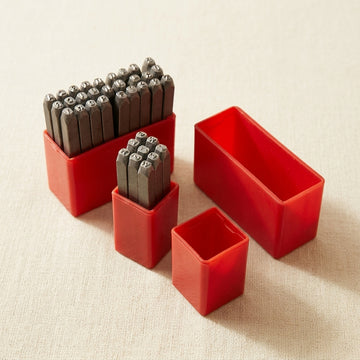
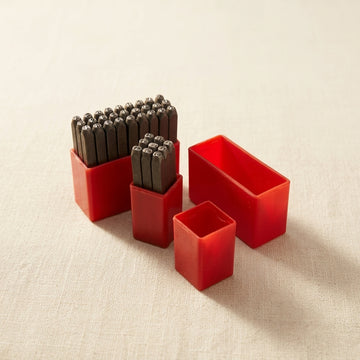
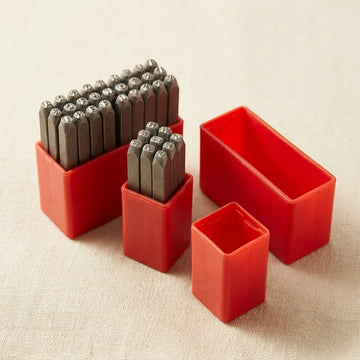
The most fundamental stamp sets are alphabetic (A-Z) and numeric (0-9). These are used for applying initials, dates, serial numbers, or spelling out words. They are indispensable for creating personalised items, identifying different batches of work, or adding specific data to a component. They are typically supplied in organised plastic or wooden cases to keep the full set together.
Design or Motif Stamps
Design stamps, also called motif stamps, are used for purely decorative purposes or as a simple, non-registered maker's mark. The range of available designs is vast, encompassing geometric shapes, flora, fauna, celestial bodies, and abstract patterns. A simple, well-placed motif can elevate a design and make it instantly recognisable. For example, a crisp impression from a 5-point star punch stamp can serve as a signature element on a series of pieces. These stamps allow makers to build a visual language for their brand without the complexity of a custom logo.
Maker's Marks and Sponsor's Marks
This category is of particular importance to jewellers in the UK. There is a critical distinction to be made:
- A maker's mark is a personal stamp, often custom-made, that features a maker's unique logo or initials. It is used for branding and identification on non-precious metals or on precious metal items below the legal weight threshold for hallmarking. It carries no legal weight on its own.
- A sponsor's mark is the official mark of an individual or company registered with a UK Assay Office. This punch is used as part of the legal hallmarking process. While you can apply your own sponsor's mark before sending a piece for assay, the full, legal hallmark can only be applied by an Assay Office. For a comprehensive overview, our UK hallmarking guide provides detailed information on the process.
Technique and Best Practices
The quality of your stamped mark is determined as much by your technique as by the tool itself. Consistency comes from a controlled process.
Choosing Your Striking Surface
The workpiece must be supported on a completely solid, non-rebounding surface. Any 'give' in the surface will absorb the hammer's energy, resulting in a faint or incomplete impression.
- Steel Bench Block or Anvil: This is the standard and best option. A heavy, flat steel block provides the unyielding support needed for a sharp, deep mark. The mass of the block absorbs the full force of the blow and directs it into the workpiece.
- Brass Block: A brass block can be used as an intermediary surface to protect the back of a delicate piece from being marked by the steel block. However, as brass is softer than steel, it will absorb a small amount of the impact force.
- Lead Cake: Traditionally, a thick lead block was used to support uneven or domed items, as the lead deforms to cradle the object. Due to the health and safety concerns associated with lead, this is now less common in professional workshops.
The Strike: Hammer and Technique
The goal is to create the full impression with a single, firm strike. Attempting multiple light taps on the same spot will almost invariably result in 'ghosting' or a double impression, as it is impossible to reseat the stamp in the exact same position. The stamp is not a chasing tool.
- Select a suitable hammer. A brass head hammer is often recommended, as the softer brass is less likely to damage the hardened steel shank of the punch over time. A heavy steel club or lump hammer (1-2 lbs) also works very well, providing the necessary mass.
- Hold the stamp firmly, with your thumb and forefinger, ensuring it is perfectly perpendicular (90 degrees) to the surface of the metal.
- Steady your hand on the bench block to provide stability.
- Focus on the top of the stamp, not the tip. Deliver a confident, powerful strike from the elbow and shoulder, not just the wrist. Let the weight of the hammer do the work.
Positioning and Alignment Aids
Accurate placement is key to a professional finish. For single marks, careful eye alignment is often sufficient with practice. For lines of text or repeating patterns, aids are essential.
- Masking Tape: Lay a straight line of masking tape on your workpiece and use the edge as a guide for the bottom of your stamps. This is a simple, cheap, and highly effective method for straight, level text.
- Scribed Lines: For ultimate precision, a lightly scribed line from a pair of dividers or a height gauge can provide a perfect guide. This line can be polished away after stamping.
- Stamp Jigs: For production work, a stamp jig is invaluable. These devices hold the stamp perfectly vertical and often include guides for consistent spacing, ensuring every piece is marked identically.
Many of the essential companion tools for this work, including hammers, bench blocks, and scribers, can be found within our wider Jewellery Making Tools collection.
Metal Compatibility: What to Stamp (and What Not To)
A punch stamp's effectiveness is entirely dependent on the relative hardness of the tool and the workpiece.
Suitable Metals
Stamps are designed to work on softer, non-ferrous metals. For the best results, the metal should be in its annealed (softened) state. Stamping work-hardened metal is difficult and produces poor-quality marks. Suitable materials include:
- Sterling and fine silver
- Gold (all carats)
- Copper
- Brass
- Bronze
- Aluminium
- Pewter
Unsuitable Materials: A Warning
The cardinal rule is: never attempt to stamp a material that is as hard as, or harder than, the stamp itself. The primary culprit here is hardened steel. Attempting to stamp a hardened knife blade, a file, or another steel tool will not mark the object. Instead, it will flatten, chip, or shatter the tip of your punch. This permanently ruins the tool and can send sharp fragments of hardened steel flying, creating a serious risk of injury. If you need to mark hardened steel, it must first be annealed to soften it, then stamped, and then re-hardened and tempered.
The UK Context: Maker's Mark vs. Hallmarking
For UK makers, understanding the legal framework around marking precious metals is non-negotiable.
Your Personal Maker's Mark
A custom-made punch with your logo is a fantastic tool for branding. It builds recognition and adds a professional, personal touch to your work. It is perfectly suitable for marking items made from base metals like copper and brass, as well as leather, wood, and other materials. You can also use it on precious metal items that fall below the legal weight thresholds for hallmarking (7.78g for silver, 1g for gold).
The Official Sponsor's Mark and Hallmarking
In the UK it is an offence, in the course of a trade or business, to describe an unhallmarked article as gold, silver, platinum or palladium, or to supply it with that description, unless it is exempt — for example because it weighs less than the exemption weight for its metal. The hallmarking process is controlled by the four UK Assay Offices. The first step for any maker is to register with an Assay Office to obtain a unique sponsor's mark. This mark, consisting of the maker's initials within a specific shape, becomes your registered legal signature in metal.
Once registered, you receive your unique sponsor's punch. You then have two options: you can apply this mark to your work yourself before sending it to the Assay Office, or you can pay a small fee for the Assay Office to laser or punch the mark for you. The Assay Office then tests the metal (assays it) and applies the remaining compulsory marks: the fineness mark and the Assay Office mark. For a full breakdown of these requirements, weights, and processes, we strongly recommend reading our detailed UK hallmarking guide.
Key Takeaways
- A quality punch is made from tool steel hardened to 60-65 HRC to ensure it can mark softer metals without deforming.
- Always support your workpiece on a solid steel bench block to ensure a crisp, deep impression.
- Use a single, confident hammer strike. Multiple taps will create a blurred, unprofessional 'ghost' mark.
- For best results on precious metals and non-ferrous alloys, always stamp the metal in its annealed (softened) state.
- Never attempt to stamp hardened steel or any material harder than the punch itself. You will destroy the tool and risk injury.
- In the UK, a personal maker's mark is for branding; a sponsor's mark registered with an assay office must be struck on an article before it is submitted for hallmarking (or struck by the assay office by arrangement).
Whether you are adding a simple decorative touch, serialising a batch of components, or applying your unique maker's mark, the right punch is an essential part of your toolkit. A well-executed stamp is a mark of professionalism and pride in your work. Explore our selection to find the right tool for your needs in our Punches & Stamps collection.
Sources
- Hallmarking Act 1973, section 1 — prohibited descriptions of unhallmarked articles (legislation.gov.uk)
- Hallmarking Act 1973, section 3 — sponsors’ marks (legislation.gov.uk)
- Hallmarking Act 1973, Schedule 1 — exempted articles, including the weight thresholds (legislation.gov.uk)
Frequently asked questions
Which metal punch stamps do I need as a jewellery maker?
Start with alphabet and number sets for initials, dates and serial numbers, then add design or motif stamps as a signature element for your work. Check the steel is hardened to 60–65 HRC, and choose impression sizes proportional to your pieces — 1mm suits delicate jewellery, while larger 6mm stamps suit belt buckles and substantial items. UK makers hallmarking precious metals will also need a registered sponsor’s mark.
Can I stamp hardened steel with a punch stamp?
No. Never stamp any material as hard as, or harder than, the punch itself. Striking a hardened knife blade, file or tool will not mark it — it will flatten, chip or shatter the punch tip, ruining the tool and sending sharp fragments flying. Hardened steel must first be annealed to soften it, stamped, and then re-hardened and tempered.
Is a maker’s mark the same as a hallmark in the UK?
No. A personal maker’s mark is purely for branding and can be used on base metals or on precious items below the hallmarking exemption weights (7.78g for silver, 1g for gold). Heavier pieces sold as precious metal must be hallmarked, and each must carry a sponsor’s mark registered with an assay office before it is submitted; the assay office then assays the piece and applies the remaining compulsory hallmarks.