Quick answer: Start with a slotted plier rack and a drilled bur stand — those two tidy the worst bench clutter and protect your most expensive tools by storing them standing, not piled. Add a canvas tool roll for sets and travelling kits, compartmented parts boxes for findings, and zone the bench so everyday tools sit within a hand's reach of the bench pin.
Ask an experienced maker what changed their bench most and the answer is rarely a glamorous tool — it is storage. A bench where every tool has a home is faster, safer and kinder to your equipment: edges stay keen, tips stay true, and you stop losing minutes hunting for the pliers you put down ninety seconds ago. This guide covers the racks, stands, rolls and organisers that turn a cluttered surface into a workshop, and how to lay them out so the right tool is always to hand.
Plier and tool racks
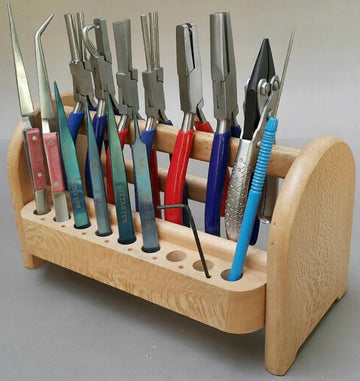
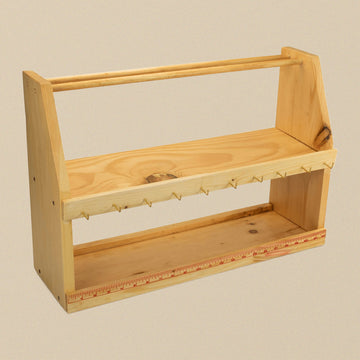
A slotted plier rack stores pliers and cutters upright by the handle, jaws down and protected, where you can see and grab each one without disturbing the rest. The same idea — a block or rack with shaped slots — keeps files, gravers and pushers separated so their working ends never knock together in a drawer. Storing tools standing rather than piled is the single biggest protection against chipped edges and bent tips.
Bur stands and small-tool blocks
Tiny consumables are where benches descend into chaos. A bur stand — a block drilled with sized holes — sorts burs, drills and mandrels by type so you can find a 0.9mm round in a second instead of tipping out a tin. The same goes for a holder for your most-used hand tools beside the bench pin: a few drilled holes save a surprising amount of fumbling.
Tool rolls and canvas wraps
A canvas or leather tool roll keeps a set together, each tool in its own pocket so edges never touch — ideal for chasing tools, gravers, files or a travelling kit. If you teach, demonstrate or work in more than one place, a roll protects fine edges far better than a box, and it lays out flat so the whole set is visible at a glance.
Drawers, trays and parts boxes
Findings, fixings and offcuts multiply quietly. Compartmented parts boxes and shallow drawer trays sort jump rings, settings and fittings by size, while a labelled small-parts cabinet keeps the bits you reach for weekly within arm's reach and the rest out of the way. The aim is not a showroom — it is being able to put your hand on the right component first time.
The "to-hand" principle
Lay the bench out in zones. The tools you use on almost every job — pliers, snips, a file, tweezers — belong within a hand's reach of the bench pin, in racks you can reach without looking. Less-used tools move to a second ring of storage, and rarely-used kit goes in drawers or on a shelf. Keep cutting and torch work clear of where you store flammables and finished pieces. A well-zoned bench is quicker and safer.
Building it up affordably
You do not need to buy it all at once. Start with one plier rack and a bur stand — those two tidy the worst of the clutter and protect your most expensive tools. Add a tool roll when you build a set worth protecting, and a parts organiser as your findings grow. Spend on storage that protects edges; it pays for itself the first time it saves a chipped graver.
For setting up the bench itself and the consumables that live on it, see our companion bench guides, and browse the storage range below.
Related guides
- Bead & Bench Scoops: Sizes, Anti-Magnetic Steel & Tidy Sorting
- Shop Racks & Storage →
- Setting Up a Jewellery Bench: 12 Essentials
- Setting Up a Jewellery Bench on a Student Budget
- Charcoal Blocks for Soldering: A Jeweller's Guide
Frequently asked questions
What bench storage do I need to buy first?
Start with one plier rack and a bur stand — you do not need everything at once. The rack stores pliers and cutters upright, jaws down and visible; the bur stand sorts burs, drills and mandrels by size. Together they tame the worst clutter and protect your most expensive edges. Add a tool roll and parts organiser as your kit grows.
Why is storing tools upright better than keeping them in a drawer?
Standing storage keeps working ends separated, so edges and tips never knock together — the single biggest protection against chipped edges and bent tips. A slotted rack or drilled block also makes every tool visible and grabbable without disturbing the rest, which saves the minutes lost hunting through a piled drawer for pliers you put down moments ago.
How should I lay out a jewellery bench for efficiency?
Work in zones. Tools used on almost every job — pliers, snips, a file, tweezers — belong within a hand's reach of the bench pin, in racks you can reach without looking. Less-used tools sit in a second ring; rarely-used kit goes in drawers or on a shelf. Keep cutting and torch work clear of flammables and finished pieces.