Quick answer: For most custom knife handles, a 5–6mm mosaic pin in a 2-inch length is the right choice — it suits EDC, bushcraft and medium kitchen knives. Go down to 3–4mm for small knives and up to 8mm or more for choppers or a statement centrepiece. Fit it with an exactly matching drill bit and a slow-curing 30-minute epoxy, then sand through the grits to reveal the pattern.
What Are Mosaic Pins?
A custom knife handle is a canvas. While the choice of wood, bone, or synthetic material forms the foundation, it is the hardware that provides the critical details. Moving beyond standard solid pins or Corby bolts, mosaic pins offer a way to embed intricate patterns directly into the handle, transforming a functional component into a focal point of the design.
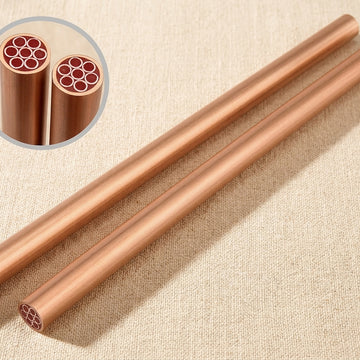
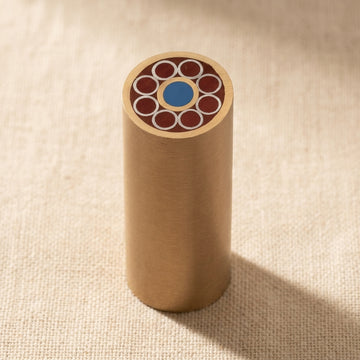
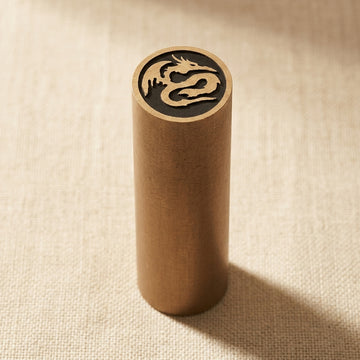
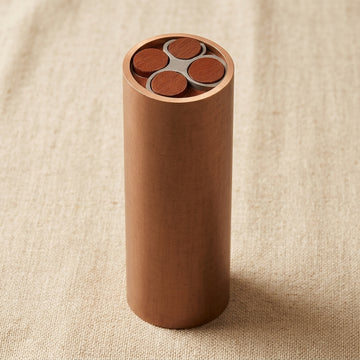
These pins are not simply decorated on the surface. They are constructed from a combination of metallic rods (typically brass, copper, and stainless steel) arranged in a specific pattern inside an outer tube. The voids between these rods are then filled with a coloured epoxy resin. When the pin is cut and sanded flush with the handle scales, this cross-section reveals the intended design, which runs through the entire length of the pin.
Mosaic Pins vs. Corby Bolts vs. Lanyard Tubes
It is important to distinguish mosaic pins from other common handle fasteners.
- Mosaic Pins: Primarily decorative, but when epoxied and peened correctly, they provide substantial mechanical strength. Their value is the aesthetic they add, revealing a complex pattern when finished.
- Corby Bolts: These are two-part mechanical fasteners with a male and female screw-together design. They provide excellent clamping force and are purely functional, recognisable by their simple slotted heads. They offer no decorative pattern.
- Lanyard Tubes: These are simple hollow tubes, usually made of brass or stainless steel, designed to create a clean, reinforced hole for a lanyard cord to pass through the handle. While they can be decorative, their primary purpose is functional.
Choosing Your Mosaic Pin: Pattern and Material
The first decision is aesthetic. The pin's pattern and material composition should complement both the handle material and the blade itself. A blade with a complex pattern, for example, might be paired with a more subtle pin, whereas a simple satin-finish blade could be enhanced by a bold handle design.
Common Pattern Types
The patterns available are extensive, but most fall into several broad categories:
- Geometric Patterns: These include simple, repeating designs like circles, squares, triangles, and checkerboards. They offer a clean, modern, and technical look that pairs well with synthetic handle materials like Micarta and G10.
- Floral and Organic Patterns: Sunbursts, flowers, and star patterns are popular choices. They provide a more natural, flowing aesthetic that can beautifully complement figured woods like stabilised burl or curly maple.
- Complex Patterns: Designs like mazes, bio-hazard symbols, or intricate star-fields fall into this category. They are often used as a central feature on a larger handle, drawing the eye and making a statement.
Material Combinations
The interplay of different metals creates the pattern's colour and character. Brass provides a warm, golden yellow; copper offers a rich, reddish-brown tone; and stainless steel or nickel silver gives a bright, silvery-white contrast. The resin used to fill the gaps is typically black, which helps to define the metallic elements and make the pattern stand out.
Technical Specifications: Diameter and Length
Beyond aesthetics, the physical dimensions of the pin are critical for a successful build. Choosing the wrong size can compromise the handle's structural integrity or look disproportionate.
Selecting the Right Diameter
The diameter of the pin should be scaled to the size of the knife. A large, chunky pin on a delicate knife will look out of place, while a tiny pin on a large chopper will be lost.
- 3mm to 4mm: Suited for very small knives, such as penknives, small paring knives, or as secondary decorative pins alongside larger structural ones.
- 5mm to 6mm: A versatile, all-purpose size. This is the most common choice for everyday carry (EDC) knives, bushcraft knives, and kitchen knives of a medium size.
- 8mm and larger: Reserved for large knives like choppers, Bowie knives, or large camp knives. An 8mm or 10mm pin can also serve as a central decorative element on a handle of any size.
Our complete Mosaic Pins collection offers a wide range of diameters to suit any project, from delicate craft knives to robust outdoor tools.
Choosing the Correct Length
Mosaic pins are typically sold in standard lengths, such as 1 inch (approx. 25mm), 2 inches (approx. 50mm), or 3 inches (approx. 75mm). The required length is determined by the total thickness of your handle assembly (scale + tang + scale). For most full-tang knives using typical 8-10mm thick scales, a 2-inch pin is usually sufficient to pass through the handle with enough excess on each side to work with. It is always better to order a pin that is slightly longer than you need; the excess will be ground away during finishing.
Installation Guide for Mosaic Pins
Proper installation is key to revealing the pin's beauty and ensuring a durable handle. A rushed job can obscure the pattern or lead to gaps and weaknesses. A dry run of the assembly is always recommended before mixing any epoxy.
-
Drilling the Handle and Tang
This is the most critical step. The holes must be perfectly perpendicular to the scales and tang. A drill press is strongly recommended over a hand drill for this task. Use a high-quality drill bit that exactly matches the diameter of your mosaic pin. An undersized hole will prevent the pin from fitting, while an oversized hole will create a weak, epoxy-filled gap that compromises both strength and appearance. Drill through one scale, use it to mark the tang, drill the tang, then use the tang to mark the second scale. This ensures perfect alignment.
-
Preparing the Pin and Epoxy
Cut the mosaic pin to the required length using a fine-toothed hacksaw. Leave about 3-5mm of excess pin protruding from each side of the handle. Lightly chamfer the edges of the pin with a file to help it slide into the hole without catching. For the adhesive, choose a high-strength, slow-curing epoxy. A 30-minute epoxy provides ample working time, whereas a 5-minute epoxy will likely begin to cure before you have everything perfectly aligned and clamped. Products like G/flex 650 are excellent as they are slightly flexible and completely waterproof. For maximum rigidity, many makers use Acraglas, a bedding compound from the firearms industry.
-
Assembly and Clamping
Before applying epoxy, thoroughly degrease all components—tang, inside of scales, and the pin itself—with acetone or isopropyl alcohol. This ensures a strong adhesive bond. Mix the epoxy according to the manufacturer's instructions, and apply a thin, even layer to the tang and the inside of the scales. Apply a small amount inside the drill holes and on the pin itself. Push the pin through the assembly, align everything, and clamp it securely. Do not apply excessive clamping pressure, as this can squeeze out too much epoxy and create a starved joint. Clean up any squeezed-out epoxy immediately with a solvent before it begins to cure.
-
Peening the Pin Ends (Optional but Recommended)
For maximum mechanical security, the ends of the pin can be peened. This involves using a small ball-peen hammer to gently tap the protruding ends of the pin. The goal is not to flatten them like a rivet, but to slightly flare the outer tube of the pin, creating a tapered head that mechanically locks the pin in place. This provides a physical lock in addition to the epoxy bond. This should be done carefully to avoid damaging the handle material.
-
Grinding Flush
Once the epoxy has fully cured (typically 24 hours), you can begin shaping the handle. Use a belt grinder with a medium-grit belt (e.g., 80 or 120 grit) to grind the excess pin material flush with the handle scales. Keep the handle moving constantly and cool it with water periodically to prevent overheating. Overheating can damage the resin within the mosaic pin, discolour heat-sensitive handle materials, and weaken the epoxy bond.
-
Sanding and Finishing
This is where the mosaic pin's pattern is truly revealed. Begin hand-sanding with 240-grit paper to remove the initial grinder marks. Work your way up through the grits: 400, 600, 800, and even up to 2000 for a glass-like finish. It is crucial to sand in one direction with each grit and then switch to a perpendicular direction for the next grit to ensure all deeper scratches are removed. Once you reach your desired finish, apply a finishing oil like Danish oil or Tung oil. This will make the colours of the metal and the wood pop, and protect the handle from moisture.
Aesthetic Pairings: Matching Pins to Handle Materials
Creating a cohesive and visually appealing knife is an art. The handle hardware should be a deliberate choice that enhances the overall design.
- Stabilised Burl and Figured Wood: These materials have their own complex, natural patterns. A pin with a sunburst or star pattern can act as a beautiful epicentre, while a simple geometric pin can provide a quiet, modern contrast.
- Micarta or G10: These synthetic materials have a uniform, often layered appearance. They are the perfect backdrop for bold, complex geometric or maze-style mosaic pins. The technical look of the pin complements the industrial nature of the material.
- Natural Bone, Horn, or Antler: These traditional materials have a rustic charm. Simple pin patterns made from brass and copper often work best, complementing the warm, earthy tones of the handle.
- Pakkawood and Dymondwood: These resin-impregnated wood laminates are stable and come in many colours. They are versatile and work well with almost any pin pattern, allowing the maker great flexibility.
The relationship between blade, handle, and hardware is what defines a custom knife. When you look at a finished piece, such as those in our Damascus Knives, Axes & Razors collection, you can see how every element is chosen to work in harmony. Understanding how to pair a handle with a blade is a key skill, and a good starting point is learning more about choosing a Damascus knife and its unique properties.
UK-Specific Considerations for Knife Makers
Postage and Sourcing
For UK-based makers, sourcing small components can present logistical challenges. Mosaic pins, being made of solid metal, are dense and can be surprisingly heavy for their size. This can lead to disproportionately high postage costs when ordering single items from overseas or even within the UK. It is often more economical to purchase components like pins, handle materials, and abrasives in a single, consolidated order from a UK-based supplier to optimise postage costs.
Legal Context
It is important to be clear on the legal situation in the UK. In England and Wales it is an offence to sell a knife, knife blade or razor blade to anyone under 18 (Criminal Justice Act 1988, s.141A), and that includes blade blanks, which are knife blades. Mosaic pins and handle scales are not bladed articles, so those age rules do not cover them. The legal responsibility falls on the maker to ensure that any knife they subsequently create, carry, or sell complies with all relevant UK legislation.
Key takeaways
- Measure Twice, Drill Once: Use a drill press and a drill bit that exactly matches your pin's diameter for a snug, professional fit.
- Epoxy Seals, Peening Secures: Use a slow-curing, high-strength epoxy for a waterproof seal, and consider lightly peening the pin ends for a permanent mechanical lock.
- Scale the Pin to the Knife: Match the pin's diameter to the overall size and purpose of your knife for a balanced and proportional design.
- The Finish Reveals the Pattern: The intricate design of a mosaic pin is only visible after careful sanding. Work through the grits methodically for a crisp, clear result.
- Choose Epoxy Wisely: A 30-minute epoxy provides a good balance of strength and working time for careful assembly. Degrease all parts before application.
- Plan Your Aesthetics: The pin is a key design element. Choose a pattern and material that complements both your handle material and your blade.
Mosaic pins represent a step up in craftsmanship, allowing a maker to add a personal, artistic signature to their work. They turn a simple handle fastener into a detailed work of art. By understanding the technical requirements for installation and the aesthetic principles of pairing them with other materials, you can elevate your custom knife projects from good to exceptional. Browse our collection to find the perfect starting point for your next handle.
Sources
- Criminal Justice Act 1988, section 141A — sale of knives and blades to persons under 18 (legislation.gov.uk)
- GOV.UK — Selling, buying and carrying knives and weapons
Related guides
Frequently asked questions
What size mosaic pin do I need for a knife handle?
Match the diameter to the knife: 3–4mm suits penknives and small paring knives, 5–6mm is the all-purpose choice for EDC, bushcraft and medium kitchen knives, and 8mm or larger suits choppers, Bowies or a decorative centrepiece. For length, a 2-inch pin covers most full-tang handles with 8–10mm scales — always order slightly longer than needed and grind off the excess.
How do I fix mosaic pins into a knife handle?
Drill with a bit that exactly matches the pin diameter — a drill press keeps the holes perpendicular — then degrease everything and bond with a slow-curing 30-minute epoxy such as G/flex 650 or Acraglas. For extra security, lightly peen the pin ends with a ball-peen hammer to flare the outer tube, then grind flush once the epoxy has cured for 24 hours.
Are mosaic pins legal to buy in the UK?
Yes. Mosaic pins and handle scales are craft components with no age restriction on purchase. Blade blanks are different: they are knife blades, and in England and Wales it is an offence to sell a knife blade to anyone under 18 (Criminal Justice Act 1988, s.141A). The legal responsibility sits with the maker to ensure any finished knife they create, carry or sell complies with the relevant legislation.