Quick answer: Match the technique to the job: pavé for fields of small accent stones, channel for a clean row of stones in a band, and flush (gypsy) for a single ultra-secure, snag-free stone in daily-wear pieces. Each needs its own kit — setting burs, beading tools and a sharp onglette graver for pavé; hart burs for channel; a burnisher or hammer handpiece for flush work.
If you've mastered the fundamentals from our bezel-vs-prong guide, your hands are ready for the next challenge. Once you can confidently build a collet and cut a seat for a claw setting, the world of fine jewellery opens up. The next four techniques in any professional setter's repertoire are pavé, channel, flush, and gypsy. They represent a significant step up in precision, control, and tooling. Each has its own distinct aesthetic, its own dedicated tool kit, and a unique set of pitfalls that can turn an expensive piece into scrap metal with one slip. This is where good habits, sharp tools, and a deep understanding of metal and stone behaviour become non-negotiable. Let's get under the loupe.
Pavé (paved with stones)
The name comes from the French for ‘paved’, and that’s exactly the effect you’re aiming for: a surface that appears to be paved with diamonds or other small gemstones. Done well, it’s a breathtaking sea of brilliance where the metal is barely visible. Done poorly, it’s a mess of crooked stones, clumsy beads, and exposed girdles. This technique is all about precision at a microscopic level.
What it is
Pavé setting involves securing many small stones, typically ranging from 1.0mm to 2.5mm in diameter, very close together. The stones are held in place by tiny beads of metal that are raised from the surrounding surface using a sharp graver. There are no separate claws or wires; the beads are an integral part of the piece. This creates a continuous, sparkling surface, often used for halo designs, eternity bands, and to embellish the shoulders of a ring.
Tools Needed
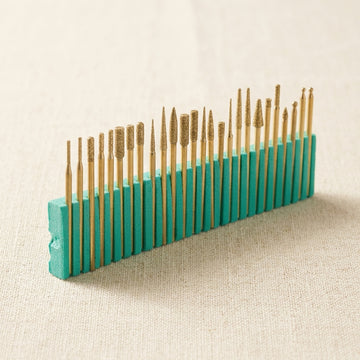
- Setting Bur: You’ll need a set of these, as the bur must be correctly sized for the stone. The golden rule is the "70% rule": the diameter of your setting bur should be approximately 70% of the stone's diameter. This cuts a seat that supports the stone's pavilion without being so wide that the girdle sinks below the surface.
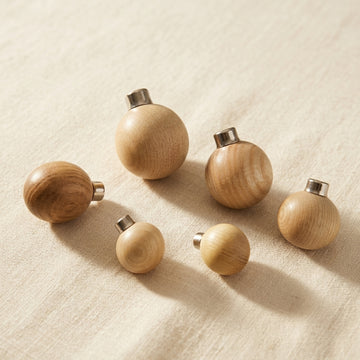
- Beading Tool Set: These tools have a small, polished hemispherical cup on the end and come in a range of numbered sizes. After raising a bead with your graver, the beading tool is used to round, shape, and harden it over the stone's girdle. A full set is essential to match the tool to the desired bead size.
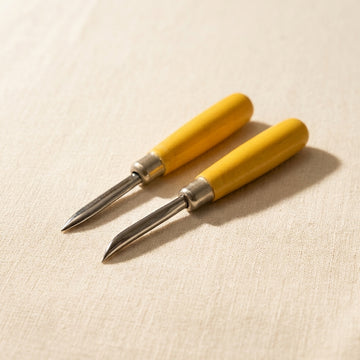
- Onglette Graver: This is the primary cutting tool for raising beads. An onglette (or "pointed") graver has a curved belly and comes to a fine point, allowing you to get between stones and lift a small chip of metal without disturbing the surrounding area. Keeping it meticulously sharpened is half the battle.
- Magnification: You cannot set pavé with the naked eye. A 10x loupe is the absolute bare minimum, but for any serious work, a stereo microscope is the professional standard. It provides depth perception, frees up both your hands, and saves your eyesight.
The Bench Routine in 6 Steps
- Layout: The foundation of good pavé is a perfect grid. Using a fine scribe and dividers, you must meticulously mark the centre point for every single stone. For a honeycomb pattern, the spacing needs to be exact to allow for shared beads. Any error here will be magnified by the time you set the last stone.
- Drill Seats: With your centres marked, use a small twist drill to create a pilot hole for each stone. This removes the bulk of the material and ensures your setting bur will run true. The drill diameter should be smaller than the stone's culet.
- Cut Bearings with Setting Bur: Following the pilot hole, use your 70%-rule setting bur to cut the conical seat (the bearing) for the stone. The critical skill here is depth control. The stone's table should sit just a fraction above the metal surface before setting, allowing the beads to lock down onto the girdle.
- Place Stone: Drop the stone into its seat. Check it from all angles. Is it level? Is the height correct? Does it rock? If so, the seat is not cut correctly. Correct it now before you touch a graver to the metal.
- Raise Four Beads with Graver: This is the moment of truth. Using your sharpened onglette graver, you enter the metal at a low angle between the stones. With a controlled forward and upward push, you lift a small, triangular bead of metal. For a single stone in a field, you'll typically raise four beads at the north, south, east, and west positions. In a row, beads are often shared between stones.
- Round Beads with Beading Tool: Select the correct size of beading tool. Place it over the rough bead you just raised and, with firm downward pressure and a slight twisting motion, form it into a perfect, bright hemisphere that securely holds the stone's girdle. This action also work-hardens the bead, making it more durable.
When to Choose Pavé
Pavé is the go-to for high-style, glamorous work. It's perfect for creating accents that add maximum sparkle without the bulk of claws or bezels. Think of the diamond-encrusted shoulders of an engagement ring, a full-set eternity band, or the glittering halo surrounding a centre stone. It’s a labour-intensive technique that commands a high price, reflecting the skill required to execute it flawlessly.
Channel Setting
Channel setting offers a clean, modern, and very secure way to set a row of stones. It’s a popular choice for wedding bands and eternity rings, providing a sleek look with no prongs to catch on clothing. However, its apparent simplicity hides significant technical challenges.
What it is
In a channel setting, a series of stones are set edge-to-edge in a metal channel. They are held in place purely by the tension of the two parallel walls, which are burnished or hammered over the girdles of the stones. There are no beads, no claws, and no metal between the stones, creating a continuous, uninterrupted flow of gems.
Tools Needed
- Hart Burs: These are the specialist burs for channel setting. Shaped like two setting burs fused back-to-back, they are designed to cut a seat into the inner walls of a channel simultaneously. You'll need a range of sizes to match the stone diameters and potentially a set of tapered hart burs for graduated stone layouts.
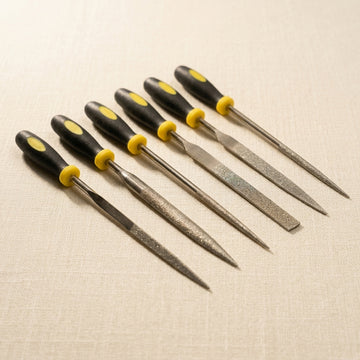
- Undercut Graver (or Flat Graver): For finer control or for getting into tight corners where a bur can't reach, a small, sharp flat graver can be used to hand-cut the bearing groove along the channel wall.
- Flat Hammer and Punch, or a Burnisher: Once the stones are in place, you need to close the channel walls. This can be done by gently tapping the top edge of the wall with a polished steel punch and a small hammer, or by using a highly polished steel or tungsten burnisher to push the metal over. A hammer-action handpiece is the modern, efficient choice.
Where It Fails
Channel setting is unforgiving. The most common failures are structural and immediately obvious:
- Walls Too Thin: If the channel walls don't have enough thickness and strength, they can spread apart under pressure or from a slight knock, causing the stones to become loose or fall out entirely. This is a design flaw before you even start setting.
- Bottom of Channel Uneven: The floor of the channel must be perfectly smooth and level. Any bumps or inconsistencies will cause the stones to tilt and sit at different heights, destroying the clean, linear aesthetic.
- Wrong Taper on Bur / Uneven Bearing: The groove cut by the hart bur must be at a consistent depth and angle along the entire length of both walls. If one side is cut deeper than the other, the stones will tip sideways. If the angle is too steep or too shallow, the stones won't have a secure seat.
The 5-Step Routine
- Cut Channel: The process begins with a perfectly milled or sawn channel. The width should be a fraction smaller than the diameter of the stones, and the depth must be sufficient to protect the culets.
- Drill Seats (optional but recommended): For round stones, drilling shallow seats in the floor of the channel helps to position them perfectly and prevents them from sliding during setting.
- Undercut with Hart Bur: This is the key step. The hart bur is run along the inside of the channel to cut a continuous groove or 'bearing' into both walls. The stones' girdles will sit in this groove. The depth must be precise, so the tables of the stones sit flush with or just below the top of the channel walls.
- Drop Stones: The stones are carefully placed into the channel, often 'snapping' into the prepared seats. They should fit snugly, girdle to girdle, without large gaps.
- Burnish Walls Inward: Using your chosen method—hammering or burnishing—you apply even, gradual pressure to the top edge of the channel walls. This pushes the metal inwards and down, tightly clamping the girdles of the stones. The key is to work along the entire length evenly, preventing any single point from taking too much stress.
Flush Setting (Gypsy Setting)
Often called a 'gypsy' setting, this technique is the epitome of understated security. It’s a favourite for men’s rings, signet rings, and pieces designed for an active lifestyle because it creates a surface that is completely smooth and snag-free.
What it is
A flush setting involves setting a single stone, usually a round brilliant, directly into the metal so that its table is perfectly level with the surrounding surface. The metal is pushed or hammered over the stone's girdle all the way around, creating a very fine, almost invisible retaining lip.
Tools Needed
- Drill Bit: To create the initial hole.
- Setting Bur: A standard setting bur that matches the size and pavilion angle of your stone is essential for creating the tapered seat.
- Burnisher: A highly polished steel or agate burnisher is the classic tool. It's used with a rocking, circular motion to push the metal over the stone's girdle.
- Hammer Handpiece: For production work or harder metals like platinum, a hammer-action handpiece with a polished, flat-faced tip is much faster and more efficient than a hand burnisher.
The Technique
The process is deceptively simple, but relies on absolute precision:
- Drill: Drill a hole slightly smaller than the stone's diameter.
- Countersink with Setting Bur: This is the most critical part. Use the setting bur to create a conical seat. The depth is everything: you need to cut just deep enough so that when the stone is placed in the seat, its table is exactly flush with the metal surface. Too shallow, and the stone sits proud; too deep, and it's lost in the hole.
- Place Stone: Pop the stone in. Check the height. It must not rock. If it does, the seat isn't true.
- Secure the Stone: Using a burnisher, start pushing the metal at the edge of the hole inwards and down over the girdle. Work your way around the stone, applying even pressure. Alternatively, use a hammer handpiece with a light, percussive action to tap the metal into place. The final result should be a thin, bright-cut circle of metal holding the stone securely.
Why Gypsy is Bullet-Proof
This setting is arguably the most secure and durable style available. With no claws to catch and wear down, and no thin walls to bend, the stone is completely protected by the bulk of the surrounding metal. This is why high-end bench jewellers and bespoke makers use it so frequently for men's signet rings and wedding bands—pieces that are expected to be worn daily for a lifetime and withstand significant wear and tear.
Gypsy Setting (A Note on Naming)
You’ll hear the terms ‘flush’ and ‘gypsy’ used almost interchangeably in the UK trade, and for most purposes, they mean the same thing. However, there is a traditional distinction. A ‘flush’ setting can refer to any stone set level with the surface. A ‘gypsy’ setting, in the strictest sense, specifically refers to a setting where the stone is seated in a tapered hole and the surrounding metal is hammered over the girdle. This hammering technique is what gives the setting its name and its legendary durability. Modern variations like "rub-over flush" settings are essentially gypsy settings by another name, relying on the same principle of burnishing a lip of metal over the stone's edge.
Choosing the Right Technique
Here’s a quick decision-making framework for your next job:
- If you need to set lots of small accent stones across a surface for maximum sparkle, your choice is pavé.
- If you have a row of similarly sized stones in a band and want a clean, modern look, you need a channel setting.
- If you are setting a single stone that needs to be ultra-secure and sit flush with the surface for daily wear, you're looking at a flush / gypsy setting.
- If you have a larger feature stone that needs maximum light and visibility, you'll fall back on the bezel or claw settings covered in our previous guide.
The Five Most Common Failure Modes (and How to Avoid Them)
Every setter has a drawer of shame filled with early mistakes. Here are the most common ones for these techniques and how to stop them from happening.
- Pavé Bead "Blown Out": This happens when you try to raise a bead and it shears off completely, leaving a horrible gouge. It's almost always caused by your graver's belly being too flat or your angle of attack being too steep. The graver needs to slice and lift, not just push. Avoid it by: Keeping your onglette graver perfectly sharpened with a slight, polished curve on the belly, and practising the "scooping" motion on scrap.
- Channel Stone Tilting: You've set a beautiful row, but one stone is leaning like a drunk. The cause is an uneven bearing. You've cut the groove deeper on one wall of the channel than the other. Avoid it by: Ensuring your piece is held perfectly level and your hart bur is run through the channel straight and true. Check the bearing with a loupe before you even think about putting a stone in.
- Flush Stone Sits Above the Surface: The classic beginner's flush-setting mistake. The stone is proud of the metal, impossible to secure properly, and looks amateurish. The cause is simple: your countersink is too shallow. Avoid it by: Cutting the seat in small increments. Cut a little, test the stone, cut a little more. It's tedious, but far better than going too deep. Aim for the stone's table to be a hair's breadth *below* the surface before burnishing.
- Cracked Stone: The sickening crunch of a stone giving way under pressure is a sound you'll never forget. It can happen if the seat is too tight (not enough metal removed for the pavilion), or if you apply too much pressure too quickly, especially on brittle stones like emeralds or tanzanite. Avoid it by: Ensuring the stone drops into its seat with no force. If it's tight, take it out and open the seat slightly. When burnishing or hammering, use gradual, even pressure. If the metal is work-hardened, anneal it before setting.
- Gallery Showing Through: You look at the side of your pavé-set ring and can see the culets of the stones poking through the gallery rail. This means you drilled your initial holes too deep for the thickness of the metal. It weakens the structure and looks terrible. Avoid it by: Knowing the thickness of your metal and the dimensions of your stones. Use a drill stop or simply a practiced eye to control your drilling depth.
Pressure and Rhythm: The Part You Can Only Learn at the Bench
Watch an experienced setter work, and they can look almost lazy. Their movements are minimal, calm, and efficient. A beginner, by contrast, is often a study in frantic, white-knuckled effort. The difference is not strength; it's rhythm and pressure, a "feel" for the tool and the metal that can only be developed over thousands of hours. It’s knowing the exact moment a graver begins to bite, the change in sound as a burnisher hardens the metal, and the precise amount of force needed to move platinum versus 18ct gold. There is no shortcut to this. The only route is to buy a bag of cheap CZs and a few ounces of scrap silver, and to practice until the movements are second nature. Every slipped graver and cracked stone is a lesson.
Magnification and Bench Setup
You can't control what you can't see. For the precision required by these intermediate techniques, your setup is as important as your hand skills. A 10x loupe is the entry-level requirement, but it's a compromise. You're constantly fighting to keep it in position, and it occupies one eye, killing your depth perception. This is why, for any setter doing more than a couple of pavé stones a week, a good stereo microscope is not a luxury; it's the standard. The ability to see the workpiece in magnified 3D, with both hands free and in a comfortable, ergonomic posture, is transformative. It turns a struggle into a controlled process. Your accuracy will skyrocket, and your error rate will plummet. This must be paired with excellent, shadow-free lighting (multiple daylight-balanced LED sources are ideal), a rock-solid bench with a good pin, a reliable clamping system like a GRS BenchMate, and a vibration-free work surface. A wobbly table guarantees a slipped graver and a ruined piece.
UK-Stocked: Fast UK Dispatch
Toolsmith stocks stone-setting hand tools such as prong pushers, burnishers and bezel-setting tools; we do not currently sell setting burs, gravers or beading tools. Everything we sell ships from UK stock, and we aim to dispatch orders placed before 2pm UK time, Monday to Friday, the same working day.
Related guides
- Bezel vs Prong: A Stone-Setting Guide for UK Jewellers
- Parallel-Action vs Standard Jewellers Pliers
- Shop all Jewellery Making Tools
Frequently asked questions
Which stone-setting technique should I use for my design?
Choose pavé when you want many small accent stones across a surface for maximum sparkle, channel for a row of similar-sized stones in a clean modern band, and flush or gypsy setting for a single stone that must sit level with the metal and survive daily wear. Larger feature stones needing maximum light still belong in bezel or claw settings.
What tools do I need for pavé setting?
Four essentials: setting burs sized to roughly 70% of each stone's diameter, a numbered beading tool set for rounding the retaining beads, a meticulously sharpened onglette graver for raising them, and serious magnification — a 10x loupe is the bare minimum, with a stereo microscope the professional standard for stones typically between 1.0mm and 2.5mm.
Why do stones tilt in a channel setting?
A tilting stone almost always means an uneven bearing: the hart bur groove was cut deeper into one channel wall than the other, or the channel floor itself is uneven. Hold the piece perfectly level, run the hart bur straight and true along both walls, and inspect the bearing with a loupe before you drop a single stone in.