Quick answer: Choose a bezel when security and protection come first — cabochons, softer stones like opal or turquoise, and active wearers; choose prongs for faceted stones where light return and sparkle matter most. Both demand a properly cut seat and the right tools: pushers, a burnisher, sharp scorpers, needle files and a loupe. Every apprentice should master both techniques.
Key difference: a bezel wraps the stone in a full metal collar for protection; prongs hold it at a few points so more light reaches a faceted stone.
| Factor | Bezel | Prong |
|---|---|---|
| Security | Full collar protects the girdle; the most secure hold | Secure when well made, but can snag, and a hard knock can bend a prong |
| Stones | Cabochons, opaque, flat-backed and softer stones such as turquoise or opal | Faceted stones such as diamonds and sapphires |
| Look | Clean, modern and substantial; can make a stone look larger | Traditional and delicate; minimal metal lets the most light into the stone |
| Repair | Removing a stone without damage is much harder | Worn or broken prongs can be re-tipped or replaced |
Bezel vs Prong Settings: An Apprentice's Guide
Moving from fabrication to stone setting is a milestone. It’s the point where a piece of metalwork transforms into finished jewellery. For many apprentices and students, the first big question is which setting to learn: the bezel or the prong?
There is no single right answer. Both are fundamental skills every bench jeweller must master. Understanding the anatomy, process, and purpose of each will not only make you a better jeweller but will also inform your designs from the very beginning. Let's break them down without the fluff.
Understanding the Anatomy
Before you can set a stone, you need to know the language. A setting is not just a random bit of metal; it is an engineered structure designed to hold a gemstone securely while displaying it to its best advantage.
The Bezel Setting
A bezel setting involves a wall of metal that wraps around the circumference of the stone, holding it in place. It is the oldest known style of stone setting, prized for its security.
- Collet: This is the technical name for the metal tube or strip that forms the main body of the bezel. You can fabricate it yourself from sheet or wire, or use pre-made collets. Making your own is a core skill, often involving some tricky first-time silver soldering challenges.
- Seat: A small ledge cut into the inner wall of the collet. The stone’s girdle (its widest edge) rests on this seat. Without a properly cut seat, the stone will rock and will never be secure.
- Rim Height: The height of the collet wall above the seat is critical. Too low, and it won’t hold the stone. Too high, and it will obscure the stone and be difficult to push over cleanly. The rim should be just high enough to be pushed over the stone's crown.
- Taper: The collet can have straight sides or be tapered. A tapered bezel can be aesthetically pleasing but requires more skill to ensure the stone fits snugly at the correct height.
The Prong Setting
A prong setting, also known as a claw setting, uses a minimum of metal to hold the stone, typically with three or more slender metal arms. This approach maximises the light that can enter the stone.
- Claws or Prongs: These are the metal arms that extend up from the base of the setting and are bent over the crown of the stone to hold it. Common configurations are four-prong (classic and clean), six-prong (more secure, makes round stones look rounder), and eight-prong (often used for a specific style or on very large stones).
- Gallery or Basket: This is the structure below the stone that the prongs are attached to. It provides support and adds a design element to the side profile of the ring. A 'gallery wire' can add decoration and strength.
- Peg or Shank: The base of the setting, designed to be soldered onto the ring band or other jewellery component.
The Right Tools for the Job
Attempting to set stones with the wrong tools is a recipe for frustration, damaged stones, and messy work. Investing in a few specialised tools is non-negotiable for a professional finish. These are a core part of any good student bench setup.
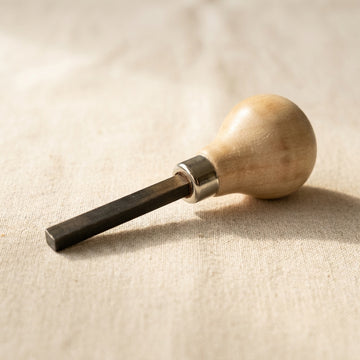
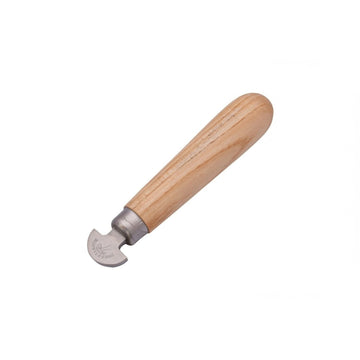
- Bezel Pusher/Roller: A bezel pusher is a simple steel rod with a polished, slightly rounded end, set in a wooden handle. It allows you to apply firm, controlled pressure to push the bezel wall over the stone. A bezel roller has a polished steel wheel and is used for a similar purpose, often giving a smoother initial roll-over.
- Prong Pusher: Similar to a bezel pusher, but the business end has a groove to grip the prong, preventing it from slipping off and scratching the stone.
- Burnisher: A highly polished steel tool, which can be straight, curved, or pointed. After pushing the metal, the burnisher is used to smooth, harden, and polish the bezel rim or prongs for a bright, professional finish. An agate burnisher is useful for final polishing on high-karat gold as it is less likely to remove material.
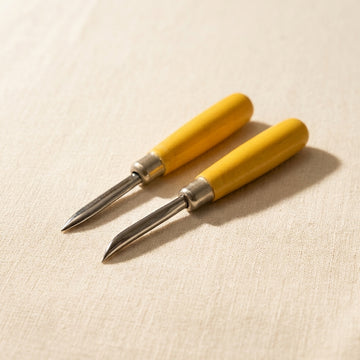
- Scorpers (Gravers): These are essential for cutting the seat inside a bezel. A flat scorper is most common for this task. They must be kept razor-sharp.
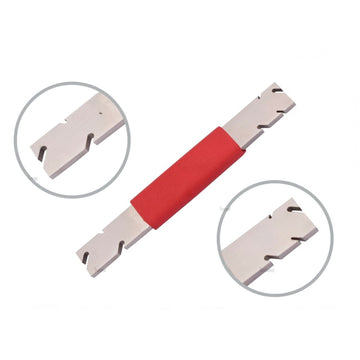
- Needle Files: A set of good quality needle files is indispensable for shaping prongs and cutting seats in prong settings. A barrette file (cut on one face only) is particularly useful for getting into tight corners without damaging adjacent surfaces.
- Loupe or Optivisor: You cannot set what you cannot see. A 10x loupe or a head-mounted magnifier like an Optivisor is essential for checking the fit of the stone, the quality of your seat, and the finish of your work.
- Beeswax/Setting Lubricant: A small dab of beeswax or a specialised setting lubricant on your burnisher helps it glide over the metal, preventing dragging and creating a brighter finish.
The Workflow: Setting a Bezel
Patience is key. Rushing a bezel setting almost always ends badly. Follow a methodical process.
- Check the Fit: The stone should drop into the collet easily but without excessive gaps. If it's too tight, you risk breaking the stone. If it's too loose, you will have to move a lot of metal, which can look messy.
- Create the Seat: The most critical step. Place the stone on the collet and use fine-point dividers or a sharp pencil to mark where the girdle sits. Alternatively, use a piece of thin wire bent into a 'U' shape to gauge the depth from the girdle to the table, then transfer that measurement inside the collet.
- Cut the Seat: Using a sharp, flat scorper held horizontally, carefully cut a level ledge around the inside of the collet at your marked line. Cut away a little at a time, checking the stone's fit frequently. The goal is for the stone to sit perfectly level on the seat with no rocking.
- Check Rim Height & Level: With the stone seated, check the height of the bezel wall. It should be just tall enough to fold over the bevel of the stone's crown. Place the collet on a flat surface and use a large flat file to level the top rim perfectly.
- Set the Stone: Clean the collet and stone thoroughly. Place the stone in the collet. Using your loupe, confirm it is sitting level and securely on the seat.
- Push the Bezel: Hold the piece securely (a ring clamp is ideal). Use your bezel pusher at a 45-degree angle. Start with a gentle push at the 12 o'clock position, then 6 o'clock, then 3, then 9. This 'cardinal points' method secures the stone in the centre.
- Work the Gaps: Now, go back and push the metal in the gaps between your initial four points. Work your way around the entire bezel until the metal wall is in complete contact with the stone.
- Burnish to Finish: Lubricate your steel burnisher slightly. Use firm, sweeping strokes at a low angle to smooth and harden the bezel rim. This removes tool marks and creates a bright, crisp edge.
The Workflow: Setting with Prongs
Prong setting is about symmetry and control. Each step must be precise to ensure the stone is level and secure.
- Prepare the Prongs: Before you even think about the stone, ensure the prongs are all of the same height, thickness, and are positioned symmetrically. Straighten and align them with pliers if needed. A good set of 7 types of pliers is a jeweller's best friend.
- Cut the Seats: This is the step many beginners skip, and it's a major mistake. Use a 3-square needle file or a setting bur to cut a small notch into the inside face of each prong. This seat should match the angle of the stone's pavilion and be at the exact same height on every prong.
- Place the Stone: Carefully slide or 'snap' the stone's girdle into the seats you have cut. If the seats are cut correctly, the stone should sit level and be held with enough tension to not fall out. This is the moment of truth for your prep work.
- Push the Prongs: Using a prong pusher, apply firm pressure to the top of the first prong (12 o'clock), pushing it over the crown of the stone. Don't push it all the way down yet, just enough to secure it.
- Follow the Sequence: Move to the opposite prong (6 o'clock) and do the same. Then move to 3 o'clock, and its opposite at 9 o'clock. This sequence ensures the stone remains centred.
- Secure Remaining Prongs: If you have a six or eight-prong setting, continue working in opposing pairs until all prongs are partially pushed over.
- Final Tightening: Go back around the setting, giving each prong a final, firm push to ensure it is fully seated against the stone's crown. You should be able to turn the ring upside down and tap it without the stone rattling.
- Finish the Prongs: Use a needle file to shape the tops of the prongs. Rounding them is common to prevent snagging. After filing, use emery paper and polishing compound to restore the shine.
Bezel vs. Prong: Making the Choice
So, which should you use? The decision depends on the stone, the design, and the intended wearer.
- Security and Durability: The bezel is the undisputed champion. The full metal collar protects the stone's girdle from chips and provides the most secure hold possible. It is the best choice for people with active lifestyles or for softer stones (like turquoise or opal). Prongs are secure when well-made, but they can snag on clothing and a hard knock can sometimes bend a prong, loosening the stone.
- Stone Type: For faceted stones (diamonds, sapphires, etc.), prongs are generally preferred. The minimal metal coverage allows the maximum amount of light to enter the stone from the sides (the pavilion), enhancing its brilliance and sparkle. For cabochons, opaque, or flat-backed stones, a bezel is the natural choice, providing a clean frame and excellent protection.
- Aesthetics: This is subjective. Bezels provide a clean, modern, and substantial look. They can make a stone appear larger. Prongs offer a more traditional, classic, and delicate appearance, placing the visual emphasis squarely on the gemstone itself.
- Maintenance and Repair: Prongs are easier to repair. A worn or broken prong can be re-tipped or replaced by a skilled jeweller. Removing a stone from a bezel without damaging the setting (or the stone) is a much more difficult task.
A Note on UK Hallmarking
Whether you use a bezel or a prong setting, if your piece is made of a precious metal, weighs at least the exemption weight for that metal (1 gram for gold or palladium, 0.5 g for platinum, 7.78 g for silver) and is to be sold described as that metal, it must be hallmarked by a UK Assay Office. The construction of your setting is part of this. If you fabricate your own collet or prong setting from stock metal, it becomes an integral part of the piece submitted for assay. If you buy a pre-made cast setting, you are relying on your supplier's stated metal quality. Always work with reputable suppliers. For a complete overview of your legal obligations as a maker, our UK hallmarking guide is an essential read.
Key Takeaways
- Bezel settings offer maximum security and protection, ideal for cabochons and active wear.
- Prong settings maximise light return and sparkle, making them perfect for faceted gemstones.
- Always cut a proper seat for the stone, whether in a bezel collet or on the prongs themselves. This is non-negotiable for a secure setting.
- Work systematically using a 'cardinal points' or 'opposing pairs' method to keep the stone centred during setting.
- Invest in the correct, high-quality setting tools. They are not optional for achieving a professional finish.
- The choice between bezel and prong depends on a balance of security, aesthetics, and the nature of the stone itself.
Mastering both bezel and prong setting techniques will make you a more versatile and confident jeweller. Don't be afraid to practice on copper with inexpensive stones. Repetition is what builds muscle memory and skill. When you are ready to equip your bench for these essential tasks, we have the professional-grade equipment you need.
Explore our full range of Jewellery Making Tools to find the pushers, burnishers, and files to get the job done right.
Sources
- Hallmarking Act 1973, section 1 — prohibited descriptions of unhallmarked articles (legislation.gov.uk)
- Hallmarking Act 1973, Schedule 1 — exempted articles, including the weight thresholds (legislation.gov.uk)
Related guides
- Burs for Jewellery Making: Hart, Bud, Cup, Ball & Wheel Burs Explained
- Pavé, Channel, Flush & Gypsy: A UK Stone-Setting Techniques Guide
Frequently asked questions
Should I use a bezel or a prong setting for my stone?
Use a bezel for cabochons, opaque or softer stones and for wearers with active lifestyles — the full metal collar is the most secure, protective option and gives a clean modern look. Use prongs for faceted stones such as diamonds and sapphires, where minimal metal lets light enter the pavilion for maximum brilliance. Prongs are also easier to repair later.
What tools do I need for bezel and prong setting?
The core kit is a bezel pusher or roller, a grooved prong pusher, a polished steel burnisher, razor-sharp flat scorpers for cutting seats, a set of needle files (a barrette file is especially useful), a 10x loupe or Optivisor, and a dab of beeswax as a setting lubricant. Attempting to set stones without them invites damaged stones and messy work.
Why does my stone rock in its setting?
A rocking stone means there is no proper seat. In a bezel, cut a level ledge inside the collet with a sharp flat scorper, removing a little at a time and checking the fit often. In a prong setting, file a matching notch at exactly the same height on every prong, then secure the stone at opposing pairs to keep it centred.