Quick answer: You can build a 20 mm leather watch strap for about £15 in materials and two hours at the bench: a 2.0-2.5 mm vegetable-tanned offcut, 20 mm spring bars, a 16 mm buckle and Ritza 25 thread, plus a sharp knife, pricking iron or awl, 3 mm notching pliers and two saddle-stitching needles. The finished strap beats most £50 shop straps.
Buying a decent leather watch strap in the UK in 2026 costs £40-£120. Making your own from a £10 leather offcut and basic tools costs around £15 in materials and two hours of bench time — and the finished strap is measurably better than most commercially-available options in the £50 range, because you control every variable (leather quality, stitch pitch, edge finish, buckle fit).
This guide is the first-build walkthrough for a single 20mm watch strap. Once you've done one, the tooling reuses across every strap you'll ever make. Skills needed: none beyond basic manual dexterity.
What you'll need
Leather
For a first build use a vegetable-tanned leather offcut, 2.0mm-2.5mm thick. Buy from a UK leather supplier (J&FJ Baker, Metropolitan Leather, AA Crack, or Amazon's saddlery sellers in a pinch). An A4-sized offcut costs £8-£15 and gives you 3-4 straps.
Skip chrome-tanned for first builds — it's softer but dyes unpredictably and doesn't burnish as cleanly at the edges. Veg-tanned is more forgiving.
Hardware
- Spring bars — 20mm pair to match your watch lug width.
- Buckle — stainless steel or brass, 16mm inside width (strap tapers from 20mm at the watch to 16mm at the buckle).
- Keeper loop — 20mm, matching the buckle metal.
- Saddle-stitch thread — Ritza 25 "Tiger" thread, size 0.6mm or 0.8mm, any colour. This is the gold standard for hand-sewn leather. £6 for a small spool.
Tools
- Sharp craft knife or rotary cutter + cutting mat — for the initial blank cut.
- Steel ruler — for straight cuts.
- Strap template — cardboard or thin metal. Download a free 20→16mm template online or cut your own.
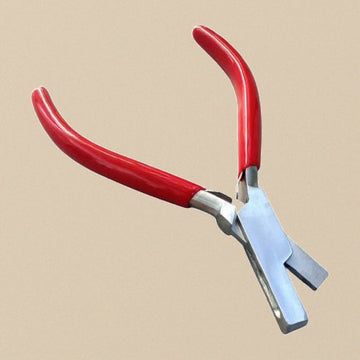
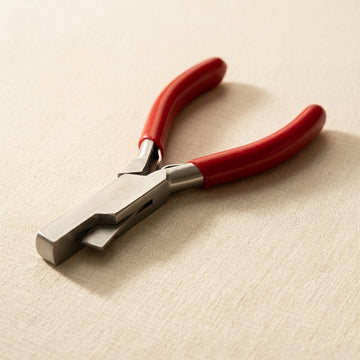
- Leather notching pliers, 3mm — for cutting buckle tongue notches. See Strap & Band Tools.
- Leather notching pliers, 1.5mm — for decorative stitching guide holes (optional for first build).
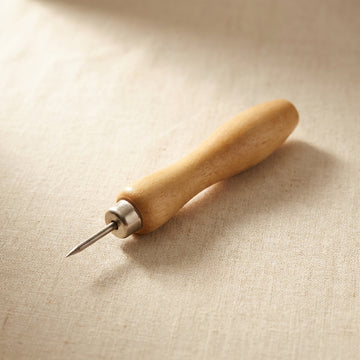
- Pricking iron or stitch chisel — 3mm or 4mm pitch. Makes evenly-spaced stitch holes. If you don't have one, use an awl with a ruler-guided marker.
- Two saddle-stitching needles — John James or equivalent, size 002 for 0.6mm thread.
- Edge creaser or bone folder — for smoothing burnished edges.
- Edge dye (optional) — Fiebing's Edge Kote or equivalent.
If you don't have a pricking iron, you can substitute a 3mm decorative design punch on a hardened bench block plus a mallet. Works cleanly enough for a first build. See Punches & Stamps and Hammers & Forming Blocks.
Step 1: Cut the blank
Using your template, cut a single strap blank from the leather. Standard 20mm watch strap = 115mm long on the watch side (with buckle and keeper), 75mm on the tongue side. Taper from 20mm at each lug end to 16mm at the buckle / tongue tip.
Cut cleanly with one confident pass — re-cutting leaves a "shredded" edge that's hard to finish.
Step 2: Skive the watch-end fold
Where the strap will fold over the spring bar, skive (thin) the back of the leather with a sharp knife held at a shallow angle. Target: reduce 2.0mm thickness to ~0.8mm over a 20mm section at each fold point. This lets the fold lie flat without bulk.
First-build shortcut: skip the skive, accept slightly bulkier folds. Still works, just less elegant.
Step 3: Glue the folds
Fold the watch-end 20mm over itself to form the spring-bar loop. Glue with leather contact cement (Copydex or Renia Colle — small tube, £4). Press firmly and let dry 30 minutes.
Step 4: Mark stitching lines
Use a compass or edge creaser to mark a stitch line 3mm in from the edge on both long sides of the strap AND across the watch-end fold. This line guides your pricking iron or awl.
Step 5: Punch stitch holes
Using a pricking iron at 3mm pitch (or awl + ruler for manual marking), punch evenly-spaced angled holes along the stitch lines. For a 20mm strap, you'll have two parallel rows each ~50-60 holes depending on length.
This is the single most important step for a good-looking finished strap. Wobble here and the strap will forever look amateur.
Step 6: Saddle-stitch
Cut a length of Ritza 25 thread roughly 4x the stitching length. Thread a needle on each end. Saddle stitch, step by step:
- Pass one needle through the first hole and pull the thread through until both ends are equal.
- Push the left needle through the next hole from the left side, then the right needle through the same hole from the right side.
- Pull both threads tight before moving on, so every stitch sits at the same tension.
- Repeat hole by hole to the end of the stitching line.
Practise on an offcut first: a neat saddle stitch comes from even tension and a consistent needle order.
Backstitch the last 3 holes at each end for lock-off. Trim and burn thread tails with a lighter (carefully).
Step 7: Punch buckle holes
On the tongue end, measure and mark 5 buckle holes at 8mm intervals starting 25mm from the buckle end of the finished strap. Use 3mm leather notching pliers for clean punched holes.

Use a round punch or awl to enlarge into oval buckle holes if desired.
Step 8: Fit buckle and keeper
Fit the keeper loop first (sliding it onto the buckle end), then the buckle. Fold the strap back over the buckle pin, punch 2 small holes for the buckle tongue to sit in, and stitch the fold closed with 8-10 saddle stitches.
Step 9: Finish edges
Sand edges with 400 grit, then 600 grit. Dampen with water, apply a small amount of edge dye (optional), rub briskly with a bone folder or burnisher. Good edges take 10 minutes per strap but transform the finished piece.
Step 10: Fit to watch
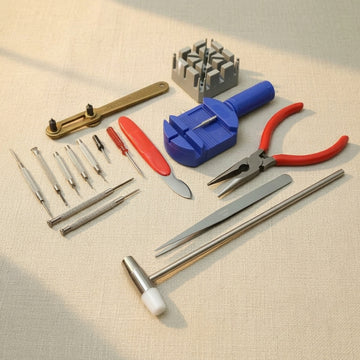
Use a spring bar tool (from any Toolsmith watch repair kit) to compress the spring bars and fit to your watch lugs. If this is your first time fitting a spring bar, see our Watch Spring Bar Replacement step-by-step guide.
Common first-build pitfalls
- Wonky stitch lines — caused by rushed pricking iron work. Slow down; each hole matters.
- Bulky folds — caused by skipping the skive step. Acceptable on first build, fix on second.
- Rough edges — caused by rushing the edge finish. Worth the 10 minutes per strap.
- Wrong buckle width — a 20mm watch takes a 16mm buckle (strap tapers). Mismatches look instantly wrong.
- Thread colour clash — tan thread on black leather reads "amateur". Match tones or commit boldly to contrast. Nothing in between.
Second strap onwards
After one full build you'll know which tools you skimped on and should upgrade. Usually: better pricking iron, better edge creaser, and a decent strap cutter for consistent blank widths. Budget for those upgrades around £40-£80 total after your first strap.
Where to buy the UK-side kit
Toolsmith stocks the notching pliers, spring bar tools and watch-specific bench kit for strap work in the Strap & Band Tools and Watch Repair Kits collections. For the leather itself, thread, buckles and specialist leatherwork tools (edge creaser, pricking iron, skiving knife), J&FJ Baker, Metropolitan Leather and Artisan Leather UK are established UK trade sources.
For watchmaking-school students working through a strap-build module, see our Watchmaking Schools UK trade page for tool-list support.
Related guides
- Watch Spring Bar Replacement - Step-by-Step UK Guide
- Watch Case Opening Tools - Complete UK Guide
- Watch Strap & Bracelet Sizing: Link Removers, Pin Pushers & Notching Pliers
Frequently asked questions
What tools do I need to make my first leather watch strap?
A sharp craft knife and steel ruler, a 20-to-16 mm strap template, 3 mm leather notching pliers for buckle holes, a pricking iron or awl for stitch holes, two saddle-stitching needles, and an edge creaser or bone folder for finishing. Materials — veg-tanned leather, spring bars, buckle, keeper and Ritza 25 thread — come to roughly £15 per strap.
What leather is best for a first watch strap build?
Vegetable-tanned leather, 2.0-2.5 mm thick. It cuts cleanly, dyes predictably and burnishes well at the edges, which makes it far more forgiving than chrome-tanned for a first build. An A4-sized offcut from a UK leather supplier costs £8-£15 and yields three to four straps, so mistakes are cheap.
What size buckle fits a 20 mm watch strap?
A 16 mm inside-width buckle. A standard 20 mm strap tapers from 20 mm at the watch lugs down to 16 mm at the buckle and tongue tip, so the buckle matches the tapered end, not the lug width. Fit the keeper loop first, then the buckle — mismatched widths look instantly wrong on the wrist.