Quick answer: Always solder gold with solder that matches both the karat and colour of the parent metal — UK hallmarking law requires gold solder of at least the article's own fineness (with a few set exceptions), and colour-matched solder keeps joins invisible. Keep Hard, Medium and Easy grades of your working alloy, use a paste flux (heavy-duty fluoride flux for rose and white gold), and heat the whole piece evenly with a propane bench torch, not a butane micro-torch.
If you learned to solder on silver, you learned on a forgiving metal. Silver is generous; it announces its readiness for solder with a tell-tale shimmer, it soaks up heat like a sponge, and its solder flows in a lazy, predictable way. Gold is not like silver. Gold is demanding, precise, and expensive. It does not suffer fools gladly. Match your solder to your alloy, your flux to your atmosphere, and your torch heat to your piece — or accept that the £80 of 18ct wire you were just forming into a ring is now a shiny, frustrating, and very costly melt-button on your soldering block. Using silver solder, or a flame far hotter than the piece needs, on 18ct white gold can slump the work into a puddle. This guide sets out how to avoid that.
Why gold solder is colour-coded, alloy-matched
The first and most fundamental rule of goldsmithing is that your solder must be an exact counterpart to the metal you are joining. Unlike the generic silver solders, gold solder is a highly specific and regulated product. This is for two critical reasons: aesthetics and the law.
First, the colour match. The entire point of a good solder join is that it becomes invisible after cleaning up and polishing. Gold solder is alloyed with other metals in precise recipes to ensure its final colour is indistinguishable from the 'parent' metal. A 9ct yellow gold solder contains the right amount of silver and copper to match the hue of 9ct yellow gold sheet or wire. Using the wrong colour solder, even if the karat is correct, will leave a faint, pale or reddish line at the seam that no amount of polishing can hide. It’s the difference between a professional piece and an amateurish mistake.
Second, and more importantly for any jeweller in the UK, is hallmark integrity. Section 4(3) of the Hallmarking Act 1973 says that, unless the assay office permits otherwise, solder in a gold article must be gold of a fineness not less than the article's own, with a few set exceptions: a 22ct (916.6) article may use solder of at least 750, and white gold of 585 to 750 may use solder of at least 500. So for an 18ct yellow gold ring (fineness 750, or 75% gold), use 18ct gold solder. The Assay Office will test not only the main body of your work but also the solder joins. If they find 9ct solder on your 18ct ring, they will, at best, refuse to mark it as 18ct. At worst, it can be rejected entirely. This is why we don’t buy generic "gold solder"; we buy "9ct yellow easy," "18ct white hard," or "22ct medium." Each name tells you the karat, the colour, and the melting point, ensuring your work is both beautiful and legally compliant. For a deeper dive, please see our full guide to UK hallmarking.
The grade ladder for each colour
Just as with silver, gold solders come in different temperature grades. This allows for "stepped soldering," where you can perform multiple joins on a single piece without melting the previous ones. The naming convention is simple: 'Hard' has the highest melting point, and 'Easy' has the lowest. Here’s how it breaks down for the three main colours of gold.
-
Yellow Gold (9ct, 14ct, 18ct, 22ct): This is the most straightforward. The temperature grades descend in a clear ladder:
- Enamelling Grade: The highest melting point solder available. It’s designed to withstand the heat of multiple kiln firings for enamelling without reflowing. Flow point is very close to the metal's melting point. Use with extreme care.
- Hard: The standard choice for the first, primary join on a piece (e.g., a ring shank). For 18ct yellow, this flows around 800-820°C.
- Medium: Used for the second join, such as attaching a bezel setting to the ring shank. For 18ct yellow, this flows around 760-780°C.
- Easy: Used for the third join, or for repairs where you need to minimise heat risk to the piece. For 18ct yellow, this flows around 720-740°C.
- Extra-Easy: The lowest temperature grade, reserved for delicate final additions or high-risk repairs.
-
White Gold (Palladium-white vs Nickel-white): White gold is where things get interesting. A common mistake is assuming it behaves like yellow gold. It doesn’t. White gold solders, counter-intuitively, tend to flow at a cooler temperature than their yellow gold counterparts of the same karat.
- Palladium (Pd) White Gold: The modern standard in the UK. It’s whiter, more malleable, and hypoallergenic. Its solders require a slightly higher heat than nickel-white alloys and are known for being a little more sluggish to flow. They demand good heat control.
- Nickel (Ni) White Gold: Found in older pieces and some specific modern alloys. It's harder, more brittle, and a known allergen. The solders for Ni-white gold flow a little more easily than Pd-white solders but are prone to brittleness if quenched too aggressively.
-
Rose Gold (with high copper content): Rose gold is beautiful, but a challenge on the bench. Its defining characteristic is a high copper content, which gives it its warm colour. This copper has two major impacts on soldering:
- It raises the melting point. Rose gold solders flow hotter than yellow gold solders of the same karat. An 18ct rose gold hard solder can require temperatures upwards of 850°C.
- It oxidises aggressively. The copper reacts with oxygen when heated, creating a thick, stubborn layer of black and red oxides (firescale) that can prevent solder from flowing at all. This makes flux choice and heat speed critical.
Flux choice by alloy
If solder is the glue, flux is the primer. Its job is to protect the metal from oxygen, dissolve any existing oxides, and help the molten solder flow cleanly into the join. Using the wrong flux for the job is like trying to run a marathon in flip-flops: you might get there, but it won’t be pretty.
- Borax Cone/Dish (The Classic): For generations, this was the only choice. You grind the cone with a little water in a ceramic dish to create a white paste. It works perfectly well for most 9ct and 18ct yellow gold soldering. Its limitation is its temperature range. At the higher or more prolonged heats required for white and rose gold, the glassy borax layer can break down, allowing oxidation to creep in and ruin your join. It’s a reliable workhorse, but not for every race.
- Auflux / Easy-Flo Paste (The Modern Standard): These are the usual choice for most gold work, and an absolute necessity for white gold. They are fluoride-based fluxes that come as a ready-made paste or liquid. They are more active at a wider range of temperatures and create a very clean, clear glassy shield over the metal. This shield stays intact for longer and at higher heats, giving you a much larger window to complete the join. The result is a cleaner flow, less cleanup, and fewer failed joins. They are well worth the small extra investment.
- Cupronil / Tenacity / High-Fluoride Fluxes (The Heavy Artillery): When you are soldering rose gold, or tackling a very difficult join on 18ct palladium white gold with hard solder, you need the most aggressive flux you can find. These fluxes are designed for the hottest, most stubborn jobs. They contain a higher percentage of active fluorides to combat the heavy oxides produced by copper-rich alloys or the high temperatures needed for platinum-group metals. They are incredibly effective but do require excellent ventilation due to the fumes produced. When a borax-based flux fails and your solder balls up in defiance, this is the stuff you reach for.
White gold's three pitfalls
Soldering white gold for the first time can be a humbling experience. It looks like a precious metal, but it often behaves with a stubbornness all its own. Be aware of these three common traps.
- Pitting from over-heated solder (gas absorption): You’ve made a perfect join, but after polishing, the seam is riddled with tiny, infuriating pinholes. This is pitting, and it’s caused by gas. White gold alloys, particularly palladium-based ones, are like sponges for oxygen when molten. If you overheat the solder or keep your flame on the join for too long after it has flowed, the molten metal absorbs gas from your torch flame. As it cools and solidifies, this gas is expelled, leaving microscopic pits. The cure is twofold: use a slightly ‘reducing’ flame (more gas, less oxygen, creating a softer, bushier flame) and practice trigger discipline. The moment the solder flashes and flows, pull the torch away. Get in, get the job done, and get out.
- Splitting along the seam (nickel-white only): This is a specific and terrifying issue with older nickel-white gold alloys. You complete a beautiful join on a vintage ring repair, quench it in water, and hear a faint *ping*. You pull it out to find a perfect crack right down the centre of your new seam. This is due to work-hardening and thermal shock. Nickel-white alloys are notoriously brittle. Quenching them from a high temperature can cause the metal to contract so rapidly that it fractures. The solution is patience. After soldering a nickel-white gold piece, let it air-cool until the red glow has completely disappeared (black heat) before you even think about putting it in the pickle pot.
- Going grey and dull: You’re trying to coax a reluctant piece of white gold solder to flow. You keep the heat on it, moving the torch back and forth, willing it to move. When it finally does, you realise the metal around the join has turned a dull, lifeless grey colour that resists all attempts to polish it back to a bright white. This happens when you heat the metal far beyond the solder’s flow point. The surface chemistry of the alloy begins to change; the palladium, zinc, or nickel can begin to ‘burn’, altering the reflective properties of the surface. It’s a sign that you lost control of the heat. The solution is to ensure the whole piece is at the right temperature *before* you focus on the join, so the solder flows instantly rather than requiring prolonged persuasion.
Rose gold's two pitfalls
If white gold is stubborn, rose gold is downright belligerent. Its high copper content creates unique challenges that centre around one thing: oxidation.
-
Surface Oxide ("Orange Peel"): The bane of anyone who works with rose gold. As you heat the piece, the copper at the surface reacts furiously with the air, creating a thick, tenacious black and red scale. If you don't use enough flux, or your heat is too slow, this oxide layer will form under the flux and prevent the solder from flowing. Even when you succeed, you can be left with a rough, pitted surface that looks like burnt orange peel and requires an immense amount of filing and sanding to remove. The prevention is a three-pronged attack:
- Use a heavy-duty, high-fluoride flux like Cupronil.
- Be generous. Flux not just the seam, but the entire area that will get hot.
- Be fast. Use a large, hot flame to bring the piece up to soldering temperature as quickly as possible, minimising the time the copper has to react with the atmosphere.
- Tarnish at the seam: You’ve soldered and polished a rose gold piece, and it looks perfect. A week later, the customer returns, and there’s a dark, discoloured line along the solder seam. This is usually due to insufficient pickling. The aggressive oxides created during soldering can be very difficult to remove completely, even if they appear to be gone. A microscopic residue of copper oxide left in the seam will slowly re-oxidise in the air, creating a tarnish line. The solution is a thorough pickle, ideally in a heated pickle pot, to ensure every last trace of oxide is dissolved. Follow this with a vigorous scrub with a brass brush and soapy water before the final polish.
Torch choice for gold
The single biggest factor in successful gold soldering is heat control, and heat control comes from your torch. Many jewellers starting out with gold try to use the same torch they used for small silver pieces, which is often the cause of their first melted ring shank.
- Butane micro-torch (The "Creme Brulee" Torch): These small, handheld butane torches are excellent for firing metal clay or soldering a tiny silver jump ring. For gold, they are a liability. They produce a very hot, but very small and intense, pinpoint flame. They lack the power to heat an entire piece of gold evenly. The result is that you super-heat one tiny spot (the seam) whilst the rest of the ring acts as a giant heat sink, drawing the warmth away. You apply more and more heat to the seam, trying to get the solder to flow, and suddenly the metal reaches its melting point and slumps. They are marginal at best, and only for the tiniest of joins on 9ct yellow gold, like attaching an earring post. Avoid them for serious gold work.
- Sievert / Bullfinch / Oxy-Propane (The Professional's Choice): This is the setup you will find on any professional goldsmith's bench. Torches like the Sievert or Bullfinch systems use bottled propane gas mixed with ambient air, whilst oxy-propane systems mix propane with bottled oxygen. Both produce a much larger, more substantial, and vastly more controllable flame. The key advantage is the ability to use a large, soft, "bushy" flame to heat the entire piece of jewellery evenly. You create a "heat-soak," bringing the whole band or bezel up to temperature. Only then do you tighten the flame and focus on the seam to make the solder flow. This even heating is what makes gold soldering predictable and repeatable. A Sievert-style air-propane torch is the perfect all-rounder for a goldsmith; an oxy-propane torch offers even greater heat and control for larger items or platinum work. Proper heat control isn't about being microwave-hot; it's about being oven-hot. It's about predictable, even heating, not frantic, localised blasting.
The 9-step yellow-gold ring band join
Let's put it all together. Here is the fundamental process for soldering a simple 9ct yellow gold ring band. Master this, and you can apply the principles to any join.
- File ends dead flat: Using a number 2 cut hand file, ensure the two ends of your ring shank are perfectly flat and square. Hold them together and check against a light source; no light should shine through the join. Solder is a bonding agent, not a gap filler.
- Set seam tight: Form the shank into a 'D' shape and use pliers to bring the ends together. The seam should meet perfectly with a slight amount of tension holding it closed. You can use iron binding wire to secure it, but with practice, a well-made join will hold itself shut.
- Anneal the band: Before soldering, heat the entire band to a dull cherry red and quench in water. This removes the stresses from bending the metal and prevents the seam from springing open when you apply heat for soldering.
- Flux the seam: Using a small brush, apply your chosen flux (borax or a paste flux) to the inside, outside, and along the edges of the join. A clean, well-fluxed join is essential.
- Cut solder pallions: Using a dedicated pair of clean shears, cut one or two tiny pieces (pallions) of HARD solder, about 2mm long. For your first join on a new piece, always start with hard solder.
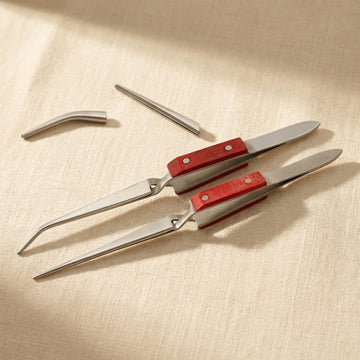
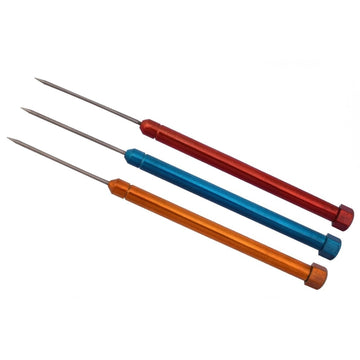
- Place pallions: Dip the tip of your tweezers or a solder pick in flux, pick up a solder pallion, and place it directly over the seam. Placing it on the inside of the band often results in the cleanest external join, as solder flows towards the heat.
- Bring whole band to dull-red even-heat: Using a large, soft flame, begin heating the entire ring band. Keep the torch moving constantly. Watch the flux; it will bubble, turn white, and then go clear and glassy. This indicates you are approaching soldering temperature. The whole piece should be glowing a faint, dull red.
- Bring torch directly on seam — solder flashes: Once the entire band is at temperature, slightly tighten your flame and move it to focus on the metal of the seam. Don't point it directly at the solder itself. The solder will be drawn by the heat and, in a sudden 'flash', will melt and flow along the seam, leaving a bright silver line. The moment you see this flash, remove the heat.
- Quench, pickle, inspect: Allow the ring to cool for a few seconds until the red glow is gone, then use brass tweezers to pick it up and quench it in a pot of water. Transfer it to your pickle pot (e.g., warm citric acid) to remove the flux and oxides. After 10-15 minutes, remove, rinse, and inspect your join. It should be a clean, full, and solid seam.
Stepped soldering: doing two joins on the same piece
The reason we have Hard, Medium, and Easy solders is for constructing complex pieces. Imagine you have just soldered your ring band with hard solder. Now you want to add a bezel setting to the top. If you tried to use hard solder again, the heat required would cause your original ring seam to melt and flow apart.
This is where stepped soldering comes in. The principle is simple: you perform each subsequent join with a solder that has a lower melting point than the last.
- Join 1: The main construction. Solder the ring band seam using Hard Solder.
- Join 2: The first addition. Solder the bezel setting onto the band using Medium Solder. The temperature required to flow the medium solder is not high enough to disturb the hard-soldered join.
- Join 3: A final detail or repair. If you need to add a tiny decorative granule or fix a crack near a previous join, you would use Easy Solder, which has the lowest flow point and therefore imparts the least heat and risk to the finished work.
This is why, from the day you decide to work with gold, you should have all three grades of solder for your chosen karat in your drawer. It’s not an extravagance; it's a fundamental part of professional jewellery construction that allows for complex designs and secure, reliable results.
Pickling gold
Pickling is the process of using a mild acid solution to chemically remove flux and surface oxides after soldering. Your two main choices in the UK are traditional Sparex No. 2 or the safer, more modern alternative, citric acid.
- Sparex (Sodium Bisulphate): This is the old-school standard. It's a granular powder that you mix with warm water. It works quickly and effectively. However, it is corrosive, requires good ventilation, and you must never use steel tools (like cheap tweezers) in it. Any iron contamination will cause all your silver and gold items in the pot to become instantly copper-plated.
Sources
- Hallmarking Act 1973, section 4 — hallmarking by assay offices, including solder (legislation.gov.uk)
- Hallmarking Act 1973, Schedule 2 — approved hallmarks and assay office marks (legislation.gov.uk)
Related guides
- Bench Fire Safety: A UK Silversmith's Essential Guide
- Jewellery Soldering Torches: Choosing Your First Bench Torch
Frequently asked questions
What solder do I need for gold jewellery?
Use solder that matches both the karat and the colour of the metal you are joining — 18ct yellow solder for an 18ct yellow shank, for example. The Hallmarking Act 1973 requires solder of the same fineness as the article, and Assay Offices test joins. Keep Hard, Medium and Easy grades of your working alloy for stepped soldering.
Why does white gold solder pit, and how do I prevent it?
Pitting is caused by gas absorption: molten white gold alloys, especially palladium-based ones, soak up oxygen if the solder is overheated or the flame lingers after flow. Use a slightly reducing (softer, bushier) flame and pull the torch away the instant the solder flashes. With nickel-white alloys, also let the piece air-cool to black heat before pickling to avoid seam cracking.
Why won't solder flow on rose gold?
Rose gold's high copper content oxidises aggressively when heated, forming firescale under the flux that blocks solder flow and can leave an 'orange peel' surface. Use a heavy-duty high-fluoride flux such as Cupronil, flux generously over the whole heated area, and bring the piece to temperature quickly with a large, hot flame so the copper has less time to react.