Quick answer: A starter forming kit needs a steel dapping block with matching hardened, mirror-polished punches, plus a brass, rawhide or nylon mallet — never strike a steel punch with a steel hammer. Anneal the metal first, then work progressively from larger depressions to smaller, rotating the disc as you tap. A 22-depression flat block offers the most versatility.
From the subtle curve of a cuff bracelet to the perfect hemisphere of a hollow bead, the ability to shape flat metal into three-dimensional forms is a cornerstone of silversmithing. This is the world of doming and dapping—a fundamental skill that, once mastered, opens up a vast range of design possibilities. Whether you're setting up your first bench or looking to upgrade your forming kit, this guide will walk you through the essential tools, techniques, and common pitfalls from a practical, bench-to-bench perspective.
At its core, dapping is the process of forming sheet metal into a dome shape using a steel punch (the dapping punch) and a corresponding depression in a block (the dapping block). It’s how we create everything from simple domed discs for earrings, to the component parts of a hollow lentil bead, to precisely shaped cups for setting cabochon stones. It’s a non-negotiable technique for any serious jeweller.
Choosing Your Forming Kit: Blocks and Punches
The quality and versatility of your forming tools will directly impact the quality and range of your work. A basic setup can get you started, but a well-chosen kit will serve you for decades. When you're ready to move beyond the basics, you'll find a whole world of specialised Hammers & Forming Blocks waiting for you.
The Workhorse: Dapping Blocks
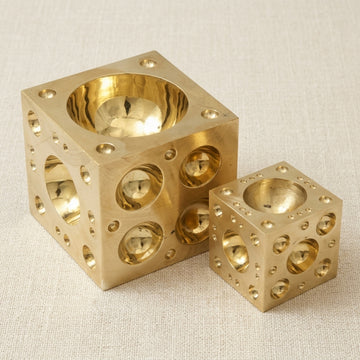
The dapping block is the foundation of the operation. It's a solid block of steel with precisely machined depressions (hemispheres) of various sizes. Your choice of block depends on the scale and complexity of the work you intend to do.
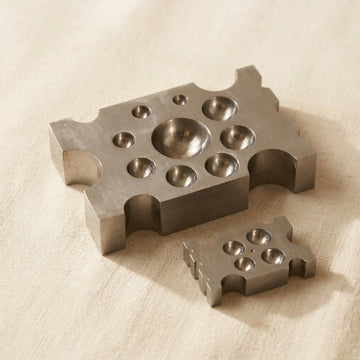
For fine, detailed work like creating small bezel cups or tiny domed elements for earrings, a Mini Flat Steel Dapping Block (8 hemispheres) is invaluable. Its compact size allows you to work with small pieces of metal without them getting lost in a huge depression, giving you greater control over tight curves.
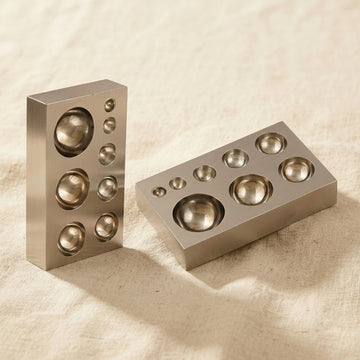
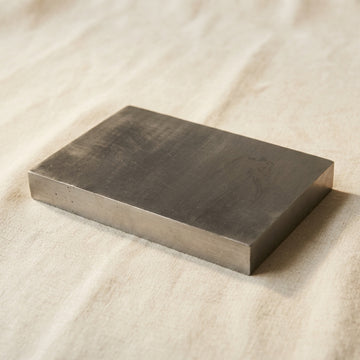
For more substantial pieces—think large pendants, box lids, or the beginnings of a small bowl—you’ll need something with more heft and larger depressions. A Solid Steel Doming Bench Block (6×4×3/4) provides the stability and range of sizes needed for bigger projects. The sheer mass of a bench block helps absorb the force of your hammer blows, making the forming process more efficient.
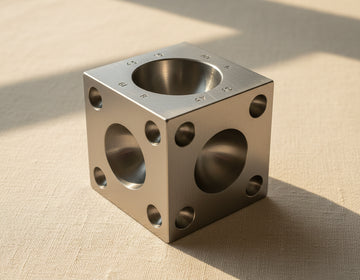
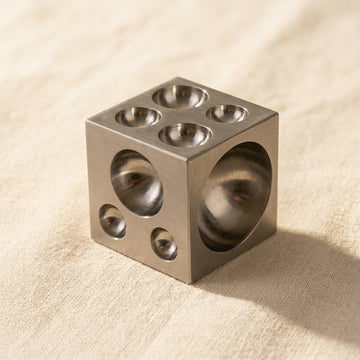
However, if you're looking for maximum versatility from a single block, the conversation changes. Whilst traditional cube-shaped blocks are common, they can be limiting. This is where a multi-depression flat block comes into its own. The Designer Dapping Flat Block (22 depressions) is a genuine game-changer for a workshop. With 22 different depressions, including ovals, channels, and various non-circular shapes alongside the standard hemispheres, it moves you from "I can make a dome" to "I can shape almost anything." It's the kind of tool that quickly becomes indispensable.
Punches: The Other Half of the Equation
A dapping block is useless without its counterpart: the punch. Dapping punches are steel rods with a polished, hardened, spherical end. They are used to push the metal down into the depressions of the block. A standard set will include a range of sizes that correspond to the hemispheres on your block. It’s crucial that the punches are made from hardened steel and have a smooth, mirror-polished finish. Any imperfections on the punch will be transferred directly onto your metal.
The Cardinal Rule: Never Strike Steel with Steel
This is the most important safety rule in forming, and it is absolute. You must never, ever hit a steel dapping punch with a steel hammer.
When hardened steel strikes hardened steel, two dangerous things happen. Firstly, the force can cause the head of the punch or the face of the hammer to chip. These tiny shards of steel fly off at incredible speed and can cause serious injury, particularly to your eyes. Secondly, the top of the punch will begin to "mushroom"—the metal will deform outwards, creating a sharp, unstable rim that is prone to cracking and sending out more shrapnel. It also ruins the punch.
The correct tool for striking a dapping punch is a hammer with a softer face. A brass mallet is the classic choice; it has enough weight to move the metal effectively but is soft enough that it will deform before the steel punch does. Rawhide or nylon-faced hammers are also excellent choices. They deliver a firm, non-marring blow and absorb some of the rebound, giving you a more controlled strike. Mastering this is part of a broader skill set, which we discuss in our guide on How to Hold a Hammer at the Bench.
The Dapping Process: A Step-by-Step Guide
Patience is the key to successful dapping. Trying to form the metal too quickly will lead to distortion, pleating, and even cracking. The goal is to gently persuade the metal into its new shape through a series of controlled steps.
Step 1: Anneal Your Metal
Before you even think about picking up a hammer, you must anneal your metal disc. Annealing is the process of heating the metal to a specific temperature and then quenching it to relieve internal stresses and make it soft and malleable. A piece of un-annealed, work-hardened sheet will resist forming and will likely crack or split under the pressure. For anyone new to the bench, this is a non-negotiable first step.
Step 2: The Cup-and-Down Progression
The secret to a smooth, even dome is to work progressively. Don't try to achieve your final depth in one go.
- Start Large: Select a depression in your dapping block that is significantly larger than the final dome you want to create. Place your annealed metal disc in the centre.
- Select Your Punch: Choose a dapping punch with a head that is slightly smaller than the depression you've chosen. The metal needs space to be drawn down into the block.
- Gentle Tapping: Place the punch in the centre of the disc and give it a few firm but gentle taps with your brass or rawhide mallet. Don't try to sink it with one mighty blow.
- Rotate and Repeat: After a few taps, rotate the metal disc slightly in the depression and tap again. Continue this process, working your way around in a spiral from the centre outwards. This encourages the metal to form evenly and prevents puckering at the edges.
- Move Down a Size: Once you have a shallow, even cup, you may need to anneal again, especially if you're working with sterling silver. Then, move to the next smallest depression in your block and repeat the process. Continue this cup-and-down progression, annealing as needed, until you reach your desired depth and curvature.
Step 3: Working with Different Metals
Different metals have different behaviours on the block. Understanding them will save you time and material.
- Copper: This is the perfect metal for practising. It's relatively inexpensive, moves beautifully, and anneals with a lovely visible glow. Its colour change upon heating makes it easy to judge the correct annealing temperature.
- Sterling Silver: The industry standard for many. It forms well but work-hardens more quickly than copper. You will need to anneal it more frequently during deep forming. Remember that heating sterling silver produces firescale (a layer of copper oxide), which must be removed in a pickle bath after each annealing cycle.
- Brass: Another excellent and affordable practice metal. It's harder than copper and can be a bit more "springy," but it teaches you to deliver firm, confident blows.
Troubleshooting Common Dapping Mistakes
Even experienced jewellers make mistakes. The key is knowing how to recognise and correct them.
- The Dreaded Lip (Overshooting): If you use a punch that is too small for the depression, or you strike too hard, the edges of your disc can get pinched between the punch and the block, creating an unwanted flange or lip. The fix is prevention: always use a punch that allows the metal to draw down smoothly.
- Lopsided Domes: This is almost always caused by off-axis strikes. If you don't hold the punch perfectly vertical, you will be applying more force to one side of the dome than the other. Focus on keeping the punch perpendicular to the block for every single strike.
- Cracks and Splits: This is the metal screaming that it's work-hardened. If you see small cracks appearing at the edge of your dome, stop immediately. You have pushed the metal past its limit. The only cause is failing to anneal when the metal needed it. Anneal more frequently on your next attempt.
Beyond the Dome: Shaping Curves on a Horn Anvil
Doming and dapping are not just for hemispheres. The same principles of moving metal apply to creating other curves, particularly for ring shanks and bracelets. For this, a dapping block is the wrong tool. You need a surface that allows for a long, continuous curve.
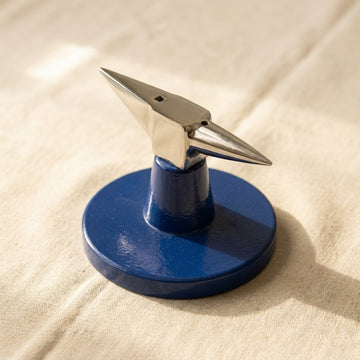
This is the job of the Mini Horn Anvil. This small but mighty tool features a flat top for general forging and a tapered horn, which is perfect for shaping rings and cuffs. By gently hammering a strip of annealed metal against the curve of the horn with a rawhide or nylon mallet, you can create beautifully consistent, flowing curves without marking the surface. You can use the thicker part of the horn for gentle bracelet curves and the thinner, tapered end for shaping ring shanks.
The Foundation for Advanced Techniques
Mastering doming and dapping is more than just learning to make a cup. It's about understanding how metal moves, stretches, and compresses. It's a foundational skill that directly unlocks more advanced techniques. The ability to form a perfect cup is the first step towards making your own bezel settings for cabochons. The ability to create two matching hemispheres is the gateway to crafting lightweight, voluminous hollow beads. It's even a core component of repoussé and chasing, where localised dapping is used to create high-relief designs.
These are not just accessories; they are fundamental Jewellery Making Tools that form the backbone of a productive workshop. Investing in a quality set of forming tools is one of the most important steps you can take in equipping your workspace, a topic we explore further in our guide, Setting Up a Jewellery Bench: 12 Essentials. Start with the basics, practise your technique, and you'll soon realise that a flat piece of sheet metal holds infinite three-dimensional possibilities.
Related guides
- Setting Up a Jewellery Bench: 12 Essentials
- How to Hold a Hammer at the Bench
- Chasing, Repoussé & Forming Hammers: A UK Silversmith's Hammer Library
- Disc Cutters for Jewellery: A UK Buyer's Guide
- Forming Stakes & Mini Anvils for Silversmiths: T-Stakes, Wheel Stakes & Micro-Forming
Frequently asked questions
What tools do I need to start doming and dapping?
A steel dapping block — a mini 8-hemisphere block for fine work, a larger solid bench block for bigger pieces, or a 22-depression designer flat block for maximum versatility — plus a set of hardened, mirror-polished dapping punches and a brass, rawhide or nylon mallet. Inexpensive copper or brass sheet is ideal for practising.
Why should you never hit a dapping punch with a steel hammer?
When hardened steel strikes hardened steel, the punch head or hammer face can chip, sending steel shards flying at speed — a serious eye hazard — and the punch top “mushrooms” into a sharp, cracking rim that ruins it. Use a brass mallet, or a rawhide or nylon-faced hammer, which deforms before the steel punch does.
Why is my metal cracking or doming lopsided?
Cracks at the edge mean the metal has work-hardened: stop and anneal — sterling silver needs annealing more often than copper. Lopsided domes come from off-axis strikes, so keep the punch perfectly vertical for every blow. A pinched lip around the edge means the punch was too small for the depression, or the strike too hard.