Quick answer: Sterilisation is a chain, not a single machine: point-of-use cleaning, ultrasonic or washer-disinfector cleaning, inspection, drying, pouching, a Type B vacuum autoclave cycle, then sterile storage with full traceability records. You cannot sterilise a dirty instrument, and aligning your lab's workflow with HTM 01-05 principles gives you a documented, defensible process.
Beyond the Autoclave: Building a Compliant Decontamination Workflow
Effective sterilisation is the cornerstone of patient safety and professional practice in any dental laboratory. While the autoclave is the star player, it's only one part of a much larger process. A failed step anywhere in the decontamination chain renders the final sterilisation useless. Getting it right isn't just about ticking boxes; it's about protecting patients, meeting your GDC obligations, and running a professional, defensible operation.
This guide lays out the complete workflow, from point-of-use cleaning to sterile storage. We'll align the process with the principles of the UK's Health Technical Memorandum (HTM) 01-05, providing a clear framework for dental technicians and lab managers to build or audit their own systems. This is about establishing a robust, repeatable, and recordable process for every instrument that passes through your lab.
The Decontamination Chain of Custody
Think of decontamination not as a single action, but as a journey every reusable instrument must take. Each stage has a specific purpose, and skipping or fumbling one compromises the entire result. A logical, one-way flow from a 'dirty' zone to a 'clean' zone is essential to prevent re-contamination.
1. Point-of-Use Cleaning (The First Defence)
The process starts the moment you put a tool down. Gross contamination like wax, plaster, or acrylic residue should be removed immediately. Why? Because once it dries, it becomes exponentially harder to clean. This 'bioburden' can shield microorganisms from disinfectants and even the steam in an autoclave. A simple rinse under running water (away from clean areas) or a wipe with a disposable cloth can make all the difference. This isn't cleaning proper; it's preparation for cleaning.
2. Transport and Pre-Soaking
Instruments should be transported from the workbench to the decontamination area in a designated, leak-proof, and lidded container. This prevents drips and aerosol generation. If there's a delay before they can be processed, they should be placed in a pre-soak solution. This prevents debris from hardening and begins to break down proteins. Use a solution designed for this purpose, not just water.
3. Cleaning: Manual vs. Automated
This is the most critical step for removing contamination. You cannot sterilise a dirty instrument. You have two primary methods: manual cleaning (often with ultrasonic assistance) and automated cleaning using a washer-disinfector.
Manual Cleaning
For many labs, manual cleaning is the daily reality. It's a multi-step process that demands care and attention.
- Personal Protective Equipment (PPE): Before you start, you must wear appropriate PPE. This includes heavy-duty gloves (not nitrile exam gloves), eye protection, and a fluid-resistant apron. This protects you from sharps injuries and chemical splashes.
- The Ultrasonic Bath: This is your most important tool for manual cleaning. It uses high-frequency sound waves to create tiny bubbles that implode on the instrument surface, a process called cavitation. This dislodges debris from joints, hinges, and serrations that brushing alone cannot reach. Use a validated detergent at the correct temperature and for the manufacturer's recommended time. Do not overload the basket.
- Scrubbing: After the ultrasonic cycle, some instruments may need a manual scrub with long-handled brushes. This should always be done fully submerged in the cleaning solution to minimise aerosols. Never use wire brushes or abrasive pads that can damage the instrument surface, creating new places for bacteria to hide.
- Rinsing: Rinse the instruments thoroughly with clean water to remove all detergent residue. For best practice, particularly under HTM 01-05 guidelines, this should be distilled or reverse osmosis (RO) water to prevent mineral deposits.
Automated Washer-Disinfectors
A thermal washer-disinfector is the gold standard. It automates the washing, rinsing, disinfecting, and drying process in a single, validated cycle. The key advantages are:
- Consistency: It performs the same validated cycle every time, removing human error and variability.
- Safety: It's an enclosed system, protecting staff from aerosols and sharps.
- Efficacy: The high-temperature disinfection stage provides a level of microbial reduction that manual methods cannot guarantee.
- Traceability: Most modern units can print a record of the cycle parameters, providing a crucial part of your audit trail.
While a significant investment, a washer-disinfector is considered best practice.
4. Inspection and Drying
After cleaning, every single instrument must be inspected under good light, preferably with magnification. You are looking for any remaining debris, stains, or damage. If an instrument is still contaminated, it must go back to the start of the cleaning process. If it's damaged—pitted, rusted, or broken—it must be repaired or discarded. A damaged instrument cannot be reliably cleaned. Once inspected and passed, instruments must be completely dry before packaging. Any moisture left can compromise sterilisation and cause corrosion. A drying cabinet or a lint-free cloth can be used.
5. Packaging and Pouching
Clean, dry instruments are then packaged for sterilisation. This is usually done using special pouches that allow steam to penetrate but prevent microorganisms from entering after the cycle is complete. Pouches have a self-sealing strip or are heat-sealed. Ensure there is space around the instrument for steam circulation and that the pouch is not punctured. Each pouch must be labelled with the contents and the date of sterilisation. This is also where you add a chemical indicator.
6. Sterilisation: The Autoclave
The autoclave uses steam under pressure to kill all microorganisms, including spores. There are different types of autoclave cycles, and using the right one is vital.
- Type N Cycles: 'N' stands for 'Naked'. These cycles are for unwrapped, solid instruments only. They are not suitable for pouched items, hollow instruments, or textiles, as the vacuum stage is insufficient to ensure steam penetration.
- Type S Cycles: 'S' stands for 'Specific'. These are designed by the manufacturer to sterilise specific load types, which will be detailed in the user manual. They may be suitable for some pouched or hollow items, but you must verify this for your machine and your load.
- Type B Cycles: 'B' stands for 'Big'. These are vacuum-assisted cycles. A vacuum pump actively removes air from the chamber and the pouches before the steam is injected. This ensures steam penetrates complex loads, including pouched, hollow, and porous items. For a dental lab processing a variety of instruments in pouches, a Type B autoclave is the usual choice.
Regular maintenance is non-negotiable for reliable performance. For a detailed breakdown of daily checks and annual servicing, see our autoclave maintenance guide.
7. Sterile Storage and Traceability
After the cycle is complete and the pouches are dry, they can be removed and stored. Sterile storage must be in a clean, dry, dedicated area, away from sinks or dirty zones. A 'first-in, first-out' rotation system should be used. The final piece of the puzzle is traceability. You must be able to link a specific instrument to the sterilisation cycle it went through and, ultimately, to the patient case it was used for. This is typically done via a logbook or digital system, recording:
- The date of the cycle.
- The cycle number.
- The results of the cycle (pass/fail).
- The results of the chemical indicator in each pouch.
- The signature of the operator who loaded and unloaded the machine.
Instrument-Specific Workflows
Not all instruments are created equal. The general process applies to all, but some items require special consideration.
Standard Hand Tools (Wax Carvers, Probes)
These are generally solid, non-complex instruments. The standard workflow (ultrasonic clean, rinse, dry, inspect, pouch, Type B sterilise) is perfectly adequate. The smooth surfaces of tools like Lecron carvers or wax knives are straightforward to clean, but pay attention to the join between the handle and the working end. For more on the different types, our guide on dental wax carvers explained offers a deeper look at their designs.
Heavy-Duty Tools (Plaster Nippers, Flasks)
Tools used for gross trimming of plaster or for casting can accumulate stubborn debris. They may require a more aggressive pre-clean or a longer ultrasonic cycle. Hinged instruments like pliers or nippers must be processed in the open position to ensure the joint is cleaned and sterilised.
Burs, Polishers, and Rotary Instruments
This is a high-risk category. The complex, intricate surfaces of burs are extremely difficult to clean, and the potential for retaining biological debris is high. Many dental practices and labs are moving towards single-use burs for any invasive work, as the risk of cross-contamination (particularly with prions, the proteins associated with Creutzfeldt-Jakob disease) is considered too great. If you do reprocess burs, a validated washer-disinfector and Type B autoclave are essential, and you must have a robust inspection process to verify cleanliness. If an item is designated single-use, do not reprocess it; the MHRA publishes guidance on the implications and consequences of re-using single-use medical devices.
Managing Critical Incidents
Even in the best-run labs, things can go wrong. Having a clear protocol for these events is just as important as the daily workflow.
Dropped Instruments
If an instrument—clean, sterile, or dirty—is dropped on the floor, it is contaminated. There is no '5-second rule'. A sterile pouched instrument must be re-pouched and re-sterilised. A loose, clean instrument must go back to the very beginning of the decontamination process: full cleaning, inspection, and re-sterilisation.
Failed Cycles or Indicator Tests
If an autoclave cycle fails, or the chemical indicator inside a pouch does not change colour correctly, the entire load must be considered non-sterile. The load should be quarantined. Do not use any of the instruments. You must investigate the cause of the failure—was the machine overloaded? Was it a mechanical fault? Was the door seal intact? Once the issue is resolved, the entire load must be re-processed through a complete, successful cycle.
Instrument Damage
The inspection stage is your chance to catch wear and tear. Pitting, corrosion, and blunt edges not only make the tool less effective but also make it impossible to clean properly. Damaged instruments must be removed from circulation. Some may be repairable, but many will need to be replaced. Maintaining a high standard in your dental instruments collection is an investment in safety and quality.
UK Regulatory Landscape: A Plain English Guide
Understanding the rules can feel complex, but it boils down to a few key bodies and documents. Our advice is based on a careful reading of these standards, in line with our editorial standards for accuracy and clarity.
HTM 01-05 (Health Technical Memorandum)
In England, HTM 01-05 provides detailed guidance on decontamination in primary care dental practices. It is written for primary care dental services rather than dental laboratories, but many labs use it as their benchmark for good practice, and aligning your lab's processes with it is a clear way to show a documented, defensible decontamination process.
GDC (General Dental Council)
The GDC sets the standards for the entire dental team, including dental technicians. Its Standards for the Dental Team set out nine principles for registrants, including 'Put patients' interests first' (Principle One) and 'Maintain, develop and work within your professional knowledge and skills' (Principle Seven). If a complaint is ever raised, you will want to be able to show a robust, effective and documented decontamination process.
MHRA (Medicines and Healthcare products Regulatory Agency)
The MHRA regulates medical devices in the UK. All dental instruments are classified as medical devices. The MHRA is primarily concerned with the safety and performance of these devices, including the instructions for use provided by the manufacturer. These instructions will often specify the required decontamination process. Deviating from these instructions could make you liable if something goes wrong. For labs that need support navigating these requirements, we offer dedicated services for trade accounts for UK dental labs.
Key Takeaways
- Decontamination is a multi-stage process, not just an autoclave cycle. Every step matters.
- Cleaning is the most critical stage. You cannot sterilise a dirty instrument. An ultrasonic bath is a minimum requirement; a washer-disinfector is best practice.
- For pouched instruments, a Type B (vacuum-assisted) autoclave is essential for ensuring steam penetration and effective sterilisation.
- Inspection after cleaning is a vital checkpoint. If an instrument is still dirty or damaged, it must not proceed to the steriliser.
- Accurate record-keeping is non-negotiable. You must be able to prove what you did, when you did it, and that the cycle was successful.
- Aligning your lab's workflow with the principles of HTM 01-05 gives you a documented, defensible decontamination process.
Building a compliant and effective sterilisation workflow is a fundamental responsibility of a professional dental laboratory. It requires investment in the right equipment, rigorous training for your team, and an unwavering commitment to the process. By treating decontamination as a complete system, you protect your patients, your staff, and your professional reputation. When it comes time to replace or upgrade your tools, ensuring you choose high-quality, durable, and easily cleanable items will make every part of this process more effective.
Sources
- NHS England — HTM 01-05: decontamination in primary care dental practices
- General Dental Council — Standards for the Dental Team
- MHRA — Single-use medical devices: implications and consequences of re-use (GOV.UK)
Related guides
- Dental Burs for Lab Technicians: Carbide vs Diamond vs Tungsten
- Dental Examination Instruments: Mirrors, Probes & Explorers
- Dental Extraction Forceps & Luxation Elevators: A UK Guide
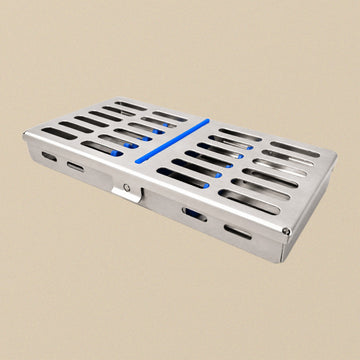
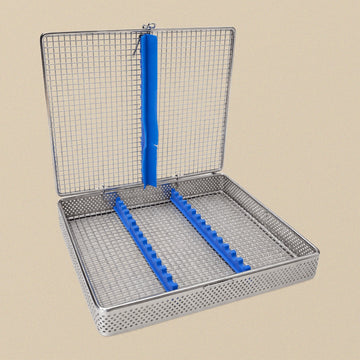
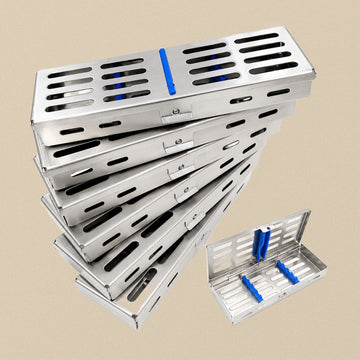
- Sterilisation Cassettes & Instrument Trays: A UK Practice Buying Guide
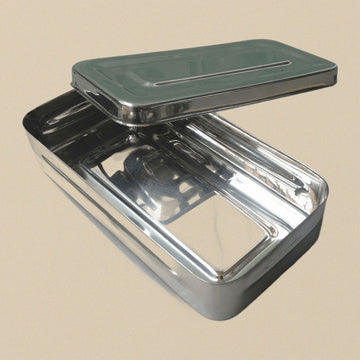
- Kidney Dishes, Trays & Instrument Boxes: A UK Clinic Guide
Frequently asked questions
What type of autoclave does a dental lab need?
For pouched, hollow or porous loads — the everyday reality of a lab — a Type B vacuum-assisted autoclave is the usual choice, because its vacuum stage ensures steam penetrates the load. Type N cycles are only for unwrapped solid instruments, and Type S cycles only suit the specific load types named in your machine's manual.
Is an ultrasonic bath enough for cleaning dental lab instruments?
An ultrasonic bath is the minimum requirement — cavitation dislodges debris from hinges and serrations that brushing cannot reach — but a thermal washer-disinfector is the gold standard. It automates washing, rinsing, disinfection and drying in one validated, traceable cycle, removing human error. Cleaning is the most critical stage of all: you cannot sterilise a dirty instrument.
What sterilisation records must a dental lab keep?
For every load you should record the date, the cycle number, the pass or fail result, the chemical indicator result for each pouch and the signature of the operator who loaded and unloaded the machine. The aim is full traceability: linking any instrument to the cycle it went through and ultimately to the patient case it was used for.