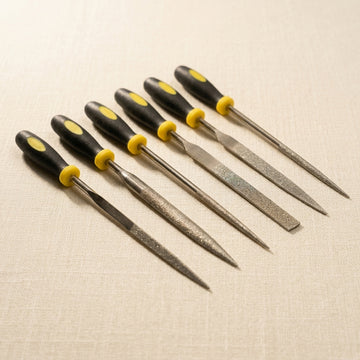
Quick answer: Start with two Swiss-pattern cuts rather than a full set: a Cut 2 for shaping and removing saw marks, then a Cut 4 to refine the surface before emery paper. A 6-inch hand/flat file with a safe edge plus a half-round cover most bench work. Files only cut on the push stroke — and store them so they never touch each other.
At the bench, some truths are self-evident. A clean solder join is a happy solder join. A sharp graver is a safe graver. And the most overlooked, yet most critical, is this: your final polish is only as good as your filing.
Too many jewellers, from eager students to seasoned pros in a hurry, treat filing as a brutish intermediate step—a mere exercise in removing material between the saw and the polishing motor. This is a costly mistake. Filing is not just sanding with steel; it is the most important preparatory stage for a flawless finish. It is the bridge between the rough-and-ready saw line and the mirror-perfect polish. Get it right, and your polishing will be quick, easy, and reveal a perfect surface. Get it wrong, and no amount of Tripoli or rouge will ever hide the sins of a poorly filed piece. As we explore in our guide to Polishing Compounds Demystified, polishing doesn't remove scratches, it just makes them shiny.
This guide is for the working UK bench jeweller. It's not about abstract theory; it's about the practical knowledge needed to select the right file, use it with precision, and care for it so it serves you for years. Let's get it right.
Why Filing Is Not Just 'Sanding with Steel'
Imagine you've just spent an hour piercing an intricate design, following your line with the focus of a hawk. Your work, fresh from the saw, is a landscape of tiny ridges and burrs left by the blade's teeth. We cover the art of sawing in our Jeweller's Saw Frames and Blades guide, but what comes next is just as crucial. Filing is the process of refining that landscape. It’s not about erasing the saw line itself, but about creating a new, progressively finer surface, ready for emery paper and then the polishing motor.
Each file cut, each shape, each stroke is a deliberate act of refinement. It’s where you straighten a line that wavered, perfect a curve that isn't quite fair, and create surfaces that are geometrically true—be they flat, concave, or convex. Every micro-scratch and uneven patch you leave behind at this stage will become a glaring canyon under the light of your polishing lamp. Mastering the file means mastering the foundation of a professional finish.
Decoding the Numbers: File Cuts Explained
When you browse a selection of Files & Engraving Tools, the most important attribute to understand is the 'cut'. In the Swiss pattern system favoured by jewellers, this is a number ranging from 00 (coarsest) to 6 (finest). For our purposes, we're interested in the 0 to 6 range.
- Cut 00/0: Very coarse. Think of this as a wood rasp for metal. Excellent for 'hogging off' large amounts of material quickly, for example, when shaping a large wax carving or cleaning up a very rough casting. Not for delicate work.
- Cut 2: The workhorse. This is your primary shaping file. It removes material efficiently but leaves a surface that is refined enough to move on from. It will leave visible file marks, but they are uniform and shallow enough to be removed by the next grade up.
- Cut 4: The pre-finisher. This file removes the marks left by a Cut 2. The surface it leaves is smooth to the touch and appears almost finished. It's the final step before you switch to emery paper or sticks.
- Cut 6: The finisher. A Cut 6 file is exceptionally fine. It removes very little material and is used for final surface refinement where the most minimal touch is required. It can often bridge the gap between a Cut 4 file and medium-grade emery paper.
Your Starter for Two: Cut 2 and Cut 4
If you're just Setting Up a Jewellery Bench or looking to build a core, effective toolkit, resist the urge to buy one of everything. You need two cuts to begin with: Cut 2 and Cut 4. Why? Because good filing is about progression. You use the Cut 2 to do the heavy lifting—shaping, flattening, and removing saw marks. Then, you switch to the Cut 4 to remove the scratches left by the Cut 2. Trying to go straight from a saw blade to a fine file is inefficient, and trying to shape with a fine file is an exercise in frustration.
The Right Shape for the Job: Your Essential File Profiles
A file's cut determines its roughness; its profile (shape) determines its application. Using the wrong shape is like trying to turn a Phillips screw with a flat-head driver—you might manage it, but you'll make a mess. Here are the essential profiles for a jewellery bench.
- Hand/Flat File: The most common file. It's parallel in width and tapered in thickness. Crucially, a proper 'hand' file has one 'safe edge' with no teeth. This allows you to file up to an inside corner without cutting the adjacent surface. Its primary use is for flat surfaces and outside curves.
- Half-Round File: Your go-to for concave surfaces. The flat side can be used as a regular flat file, whilst the rounded back is perfect for the inside of ring shanks and fairing curves.
- Round ('Rat-Tail') File: A tapered, fully round file. Essential for enlarging holes, refining the inside of a bezel setting, or creating rounded grooves and channels.
- Square File: Four cutting faces, tapered to a point. Used for creating or refining square or rectangular holes (like for a princess-cut setting) and getting into sharp, 90-degree corners.
- Three-Square (Triangular) File: With three cutting faces and sharp corners, this is the tool for filing acute angles (less than 90 degrees). Perfect for cleaning up the corners of V-shaped bezels or sharpening grooves for inlay work.
- Barrette File: A specialist's secret weapon. A barrette file is tapered and has teeth on only one flat face; the other faces are all 'safe'. This makes it the ultimate tool for refining tight corners, as you can file one surface right into the join without any risk of damaging the other.
- Equalling File: Often confused with a hand file, but with a key difference: an equalling file is parallel in both width and thickness (it doesn't taper). This makes it ideal for filing slots and creating perfectly uniform, flat surfaces where a tapered file's changing dimensions would be a hindrance.
What About Size? 4", 6", 8" and Beyond
File length is measured from the shoulder to the tip, excluding the tang. For general bench jewellery work, a 6-inch file is the default. It offers a good balance of cutting surface and control. For very fine, detailed work—inside a filigree design or refining a setting—a set of 4-inch needle files is indispensable. For larger work, like preparing sheet stock or shaping heavy silver ingots, larger 8-inch or 10-inch files provide the necessary heft and surface area for rapid, efficient material removal.
Technique: From Clumsy Scrubbing to Surgical Precision
The finest file in the world is useless without correct technique. The goal is control, efficiency, and a predictable result.
The Golden Rule: Push, Don't Pull
This is the most important lesson you will ever learn about filing. A file only cuts on the push stroke. The teeth are angled forward, like tiny ploughs. When you push the file across the metal, they dig in and shear off a small amount of material. The return stroke, pulling the file back, does nothing productive. Worse, it does two very bad things: it 'glazes' or burnishes the teeth, dulling them prematurely, and it can burnish the metal surface, making it harder for the next push stroke to bite. Get into the habit now: apply pressure on the push stroke, lift slightly or apply zero pressure on the return stroke. Your files will last longer and your work will improve overnight.
Grip, Pressure, and Movement
Hold the file handle firmly but not in a death grip. Your other hand should guide the tip of the file, using your thumb and forefinger to apply and modulate pressure. The pressure should be even and consistent along the stroke. Let the file do the work; don't try to force it. A sharp file with light, even pressure will cut more cleanly and quickly than a dull file being forced into the metal. Your entire body should be involved. Lock your elbows to your sides and use your shoulders and torso to create the movement, not just your wrists and arms. This leads to a longer, straighter, more controlled stroke.
Achieving a Truly Flat Surface
To file a surface perfectly flat, use a technique called 'draw filing' or 'cross filing'. First, file across the surface in one direction. Then, lift the file, turn it 45-90 degrees, and file again. The scratch pattern from the second direction will remove the scratches from the first. Any remaining scratches from your first pass indicate a low spot that you haven't touched yet. Continue this process, changing direction, until you have a uniform scratch pattern across the entire surface. This is the only way to be certain you've created a truly flat plane, not a subtly rounded one.
Care and Custody: Protecting Your Investment
Files are tools, but they are also precision instruments. Their hardened steel teeth are brittle. Mistreat them, and they will fail you.
Keeping it Clean: File Cards and Brass Brushes
As you file, tiny particles of metal get stuck between the teeth. This is called 'pinning'. A pinned file doesn't cut properly; instead, it gouges deep, ugly scratches in your work. You must keep your files clean. The standard tool for this is a 'file card'—a wooden block with short, stiff steel bristles. For finer files, a simple brass brush is often better, as the softer brass is less likely to damage the delicate teeth. Brush the file in the direction of the teeth to flick the debris out.
The Cardinal Sin of File Care
You will see people do this. Do not be one of them. NEVER, EVER tap your file on the bench, vice, or peg to knock out debris. Files are made from high-carbon steel and are hardened to be incredibly rigid and hold a sharp edge. This process also makes them extremely brittle. Tapping a file like this is the fastest way to snap it in half or chip a tooth, rendering it useless.
Safe Storage Solutions
The second cardinal sin is storing files loose in a drawer. When they knock against each other, the fine, sharp teeth are chipped and dulled. This is a complete waste of a good tool. Proper storage is non-negotiable.
- File Racks: A purpose-built wooden or plastic rack with individual slots is ideal.
- Tool Rolls: A canvas or leather tool roll with individual pockets protects files perfectly, especially for transport.
- DIY Solutions: Even a block of wood with holes drilled into it is a far better solution than a jumble in a drawer.
Protect your files, and they will protect the quality of your work.
Beyond the Straight and Narrow: An Introduction to Rifflers
For most flat and simple curved surfaces, your standard file set will suffice. But jewellery is rarely simple. For the complex, organic shapes, recesses, and detailed carvings, you need riffler files. These are double-ended files with curved shanks and variously shaped cutting heads. They are designed to reach into places a straight file cannot go: the inside of a carved flower petal, the curve where a setting meets a shank, the concave surface of a small sculptural element. They come in a huge variety of shapes and follow the same cut numbering system. While not a day-one purchase, once you need one, you'll realise no other tool will do.
The Final Cut: Skill Trumps Expense
A comprehensive set of high-quality Swiss-pattern files is a significant investment, but it's one that pays dividends in every piece you make. They are a fundamental part of the professional's arsenal of Jewellery Making Tools. However, it's crucial to remember the principle that governs all craft: technique is paramount. A cheap £5 file used with skill, precision, and care will produce a £50 result. A top-of-the-line £50 file used badly—pulled on the return stroke, clogged with pinning, and stored loose in a drawer—is just an expensive piece of scrap metal. Respect the file, master its use, and it will become one of the most powerful and rewarding tools on your bench.
Related guides
- Jeweller's Saw Frames and Blades: Pick the Right Combo
- Polishing Compounds Demystified: Tripoli, Rouge, White Diamond and When To Use Each
- Setting Up a Jewellery Bench: 12 Essentials UK Bench Jewellers Actually Use
- Hand Gravers for UK Bench Jewellers: A First-Buy and Sharpening Guide
- Disc Cutters for Jewellery: A UK Buyer's Guide
Frequently asked questions
Which file cuts do I need to start jewellery making?
Two: Cut 2 and Cut 4. The Cut 2 is the workhorse for shaping, flattening and removing saw marks; the Cut 4 then removes the Cut 2’s scratches, leaving a near-finished surface ready for emery paper. Coarser cuts (00/0) for heavy removal and the ultra-fine Cut 6 can be added later as the work demands.
Why should you only file on the push stroke?
A file’s teeth are angled forward and only cut when pushed. Dragging it back under pressure glazes and dulls the teeth prematurely and burnishes the metal, making the next stroke less effective. Apply pressure on the push, then lift or release pressure on the return — your files will last longer and your work will improve.
How should jewellery files be stored and cleaned?
Never loose in a drawer, where the teeth chip and dull against each other — use a file rack, a tool roll, or even a drilled wooden block. Clear pinned metal debris with a file card or a brass brush, working in the direction of the teeth. And never tap a file on the bench: the hardened steel is brittle and can snap or chip.