Quick answer: A beginner needs a balanced Damascus straight razor plus a shaving brush, traditional soap, leather strop and alum block — UK buyers must be 18 or over. Prepare with a hot towel and a thick lather, hold the blade at roughly 30 degrees with light pressure, and shave with the grain first. Afterwards, rinse the blade, dry it completely and oil it to prevent rust.
Why a Straight Razor?
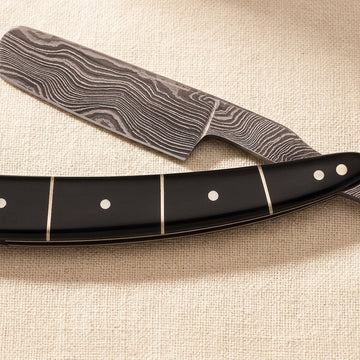
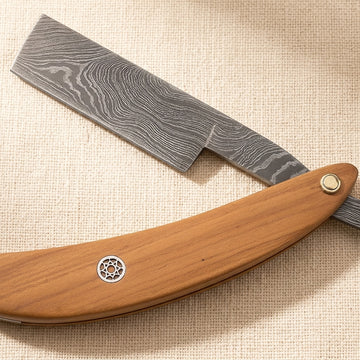
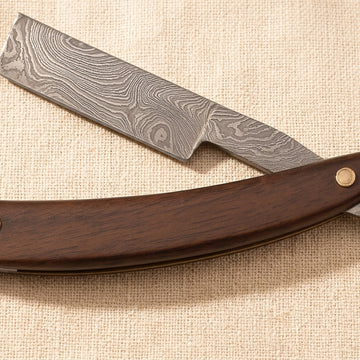
The move from a disposable cartridge razor to a straight razor is a significant one. It’s a shift from a convenient, if somewhat detached, daily task to a deliberate, skilled ritual. For many, the allure of a Damascus steel razor is its primary draw. The unique, layered patterns of the steel are not merely decorative; they are the visible result of forge-welding different types of steel, creating a blade that holds a keen edge. This is not just shaving; it is the adoption of a craft.
Using a straight razor, particularly a Damascus one, requires patience, respect for the tool, and a willingness to learn. The first few shaves will be a learning curve. This guide provides a practical framework for that first shave, from assembling your kit to the final, crucial step of oiling the blade. It is a skill that, once mastered, offers an unparalleled shave and a deep sense of satisfaction.
Your Essential Wet Shaving Kit
Assembling the right tools is the first step. While the razor is the centrepiece, the supporting equipment is just as important for a safe, comfortable, and effective shave. A complete kit ensures you can prepare your skin, build a proper lather, and care for your blade after use.
- Damascus Straight Razor: The core of your kit. These razors are typically made from high-carbon steels like 1095 and 15N20. This composition allows for an exceptionally sharp edge but also means the blade requires diligent care to prevent corrosion. When choosing, look for a blade that feels balanced in your hand. Our Damascus straight razors collection offers various profiles and handle materials to suit individual preferences.
- Shaving Brush: Essential for creating a rich lather and exfoliating the skin. Brushes are typically made from badger, boar, or horse hair. Badger hair is known for its softness and water retention, while horse hair offers a good balance of backbone and soft tips. The brush lifts the hairs off the face, allowing the blade to cut them cleanly.
- Shaving Soap or Cream: Forget aerosol foams. A traditional shaving soap, loaded onto the brush and worked into a lather, provides superior cushion and glide. Soaps are harder pucks, while creams are softer. Both produce a stable, protective lather when mixed with water.
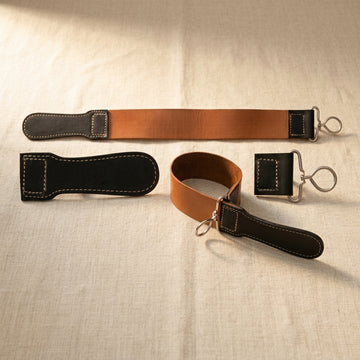
- Strop: A strop is not for sharpening; it is for honing or realigning the microscopic teeth of the blade's edge before each shave. It consists of a leather component for the final polish and often a canvas or linen component for initial cleaning. Stropping is a non-negotiable daily ritual.
- Alum Block: A crystalline block of potassium alum. When applied to the face after shaving, it acts as an antiseptic and astringent, closing pores and stopping bleeding from any minor nicks. It also provides valuable feedback, stinging slightly where your technique was less than perfect.
- After-shave Balm: A quality balm soothes and moisturises the skin, replacing moisture lost during the shave and reducing irritation. Look for alcohol-free formulations to avoid drying out the skin.
- Towel: You will need at least one small towel for preparing your face with hot water.
For those starting out, an integrated set can be a convenient way to acquire the essentials. A 4-piece wooden shaving kit often includes a brush, bowl, and stand, providing a solid foundation to build upon.
A Note on UK Legal Context
In England and Wales it is an offence to sell a knife or razor blade to anyone under 18 (Criminal Justice Act 1988, s.141A), and Toolsmith sells straight razors to adults aged 18 or over only. Owning and using a straight razor for its intended purpose of shaving is, of course, perfectly legal. For a broader understanding of the legal framework surrounding bladed tools in the UK, our UK Knives & Axes Guide provides more detailed information.
Preparation is Everything
You cannot achieve a good shave with a great razor on a poorly prepared face. The goal of preparation is to soften the beard hairs and hydrate the skin, making the passage of the blade as smooth as possible.
The Hot Towel
The classic barbershop hot towel is not just for show. It dramatically softens the bristles of your beard.
- Start by washing your face with warm water and a mild soap to remove any oils or dirt.
- Submerge a small towel or face flannel in hot (but not scalding) water.
- Wring out the excess water, leaving the towel damp and hot.
- Drape the towel over the area you intend to shave and leave it for 2-3 minutes. The steam will open your pores and soften the hair. Alternatively, shaving after a hot shower achieves a similar effect.
Building the Lather
A proper lather is the single most important element for protecting your skin. It should have the consistency of thick yoghurt or meringue, with no visible bubbles.
- Soak your shaving brush in warm water for a minute or two. This allows the bristles to absorb water.
- If using a hard soap puck, gently squeeze the excess water from the brush, but leave it damp. Swirl the brush tips on the soap for 30-45 seconds to 'load' it with soap.
- Transfer the loaded brush to a shaving bowl (or apply directly to your face). Begin swirling the brush, adding a few drops of water at a time, until a thick, rich lather forms. This process can take a couple of minutes. Be patient.
- Once the lather is ready, use painting-like strokes to apply it evenly across your beard. Ensure the area is completely covered with a thick, protective layer.
The First Shave: Technique and Control
With your face prepped and lathered, it is time to pick up the razor. Your first shave should be slow and deliberate. Focus on technique, not speed or closeness.
Holding the Razor
The standard grip provides the most control. Open the razor so the blade and handle (the scales) form a straight line or a slight angle. Place your ring, middle, and index fingers on the back of the shank (the metal part between the blade and the pivot). Rest your thumb on the underside of the shank, near the blade. Your little finger can rest on the tang (the curved tail) for extra stability.
The 30-Degree Rule
The angle of the blade against your skin is critical. The ideal angle is approximately 30 degrees. Too shallow (less than 30 degrees), and the blade will skate over the hair without cutting. Too steep (more than 30 degrees), and it will dig into your skin, causing irritation and cuts. To find the angle, lay the blade flat against your cheek and then raise the spine by about twice the thickness of the blade itself. Use light pressure; let the weight of the razor do the work.
Stretching the Skin
A straight razor works best on a flat, taut surface. Use your free hand to stretch the skin in the opposite direction of the blade's travel. For your cheek, pull the skin up towards your ear. For your neck, tilt your head back and pull the skin down below your collarbone. This creates a smooth runway for the blade and reduces the risk of nicks.
The Four-Pass Shave
A multi-pass approach is used to gradually reduce the beard, increasing closeness with each pass while minimising irritation. First, you must understand your beard's grain. Run your hand over your stubble; the direction in which it feels smoothest is with the grain (WTG). The direction that feels roughest is against the grain (ATG).
-
Pass 1: With the Grain (WTG)
This is the most important pass. Start with your cheeks, using short, gentle strokes of about 25-40 mm. Move the razor down your face, following the grain. Do not apply pressure. Rinse the blade in hot water after every few strokes to clear it of lather and hair. Once the first pass is complete, do not be tempted to go over areas without lather. -
Pass 2: Across the Grain (XTG)
Rinse your face, re-lather, and begin the second pass. This time, you will shave across the grain. On your cheeks, this might mean shaving from your ear towards your nose. This pass will remove more hair and get you closer to a smooth finish. For beginners, stopping after two passes is a perfectly acceptable and safe option. -
Pass 3: Against the Grain (ATG)
This pass offers the closest possible shave but also carries the highest risk of irritation. Only attempt this once you are confident with the first two passes. Rinse and re-lather again. Stretch the skin taut and use extremely light, careful strokes against the direction of hair growth. For many, an ATG pass on the neck is too aggressive; listen to your skin. -
Pass 4: The Pickup Pass
After your final pass, rinse your face with warm water and feel for any rough patches. If you find any, apply a small dab of remaining lather and carefully shave just that spot. This is preferable to doing a full fourth pass.
Finishing the Shave
The post-shave routine is designed to calm, heal, and protect your skin.
- Cold Rinse: Rinse your face thoroughly with cold water. This helps to close the pores and soothes the skin. Pat your face dry with a clean towel; do not rub.
- Alum Block: Wet the alum block with cold water and gently glide it over the shaved areas. It will provide antiseptic benefits and immediately stop bleeding from any tiny nicks. The stinging sensation will tell you where your technique needs refinement. Leave the residue on for a minute, then rinse off with cold water.
- After-shave Balm: Apply a small amount of a hydrating, alcohol-free after-shave balm. This will replenish moisture and calm any remaining irritation, leaving your skin feeling comfortable and refreshed.
Post-Shave Razor Care
A Damascus steel razor is a tool for life, but only if cared for correctly. Carbon steel is prone to rust, and humidity is its enemy.
- Rinse Thoroughly: Immediately after your shave, rinse the blade under hot running water to remove all soap and hair. Pay close attention to the pivot area.
- Dry Completely: This is the most critical step. Use a dry towel to carefully pat the blade and handle dry. To dry the area between the scales, you can use a hairdryer on a low setting or a piece of compressed air. Ensure there is absolutely no moisture left, especially at the pivot pin.
- Oil the Blade: Apply a thin coat of mineral oil or a specialist blade oil to the entire blade. This creates a barrier against oxygen and moisture. A small drop, spread thinly with a soft cloth or cotton bud, is all that is needed.
- Store Dry: Store the razor in a dry place. The bathroom medicine cabinet, with its high humidity from showers, is the worst possible location. Store it in a bedroom or study, preferably in a case or box that allows for some air circulation.
Stropping: The Daily Maintenance
Stropping realigns the blade's edge before every shave. It does not remove metal. You will need a leather strop, which should be mounted securely.
How to Strop
Lay the razor flat on the leather at the end of the strop closest to you. The spine and the edge should both be touching the leather. Draw the razor towards you, leading with the spine. The cutting edge must always trail behind. When you reach the end, roll the razor over on its spine—never lift it and never let the edge touch the strop as you turn. Then, push the razor away from you, again leading with the spine. Repeat this for 40-50 round trips. The motion should be smooth and controlled, without pressure.
A Note on Pastes
Your primary leather strop should remain clean. Do not apply abrasive pastes or compounds to it. These are for sharpening and should be used on a separate, dedicated strop (often made of canvas, felt, or a secondary leather strop) and only when the blade begins to feel dull and stropping alone is no longer effective. For a beginner, a clean leather strop is all that is required for daily use.
Key Takeaways
- Preparation is paramount: A hot towel and a quality lather are non-negotiable for a comfortable shave.
- Master the angle: Maintain a consistent 30-degree angle between the blade and your skin. Let the razor's weight do the work.
- Work in passes: Use a multi-pass system (WTG, XTG) to reduce the beard gradually. Do not rush to an against-the-grain shave.
- Stretch the skin: Always use your free hand to create a flat, taut surface for the blade to glide over.
- Care for your blade: After every shave, you must rinse, dry completely, and oil your Damascus razor to prevent rust.
- Strop before every shave: A daily stropping routine of 40-50 laps will maintain the edge's alignment and ensure it is ready for use.
Learning to shave with a Damascus straight razor is a rewarding journey. It demands respect for the tool and a methodical approach, skills familiar to any craftsperson. The result is not only a superior shave but a deeper connection to a timeless daily ritual. When you are ready to select your first blade or expand your collection, you can explore our full range of Damascus Knives, Axes & Razors.
Sources
- Criminal Justice Act 1988, section 141A — sale of knives and blades to persons under 18 (legislation.gov.uk)
- GOV.UK — Selling, buying and carrying knives and weapons
Related guides
- How to Sharpen Damascus Knives with Whetstones
- Wet Shaving with a Safety Razor: A UK Starter Kit Guide
- Double-Edge Safety Razor Blades Explained
- Shaving Brushes & Stands: Horse Hair, Badger & Care
Frequently asked questions
What do I need for my first straight razor shave?
Beyond the razor itself, you need a shaving brush, a traditional shaving soap or cream, a leather strop for daily edge realignment, an alum block, an alcohol-free after-shave balm and a small towel for hot-towel preparation. An integrated kit with brush, bowl and stand is a convenient way to start. In the UK you must be 18 or over to buy a straight razor.
What angle should I hold a straight razor at?
Around 30 degrees to the skin. Lay the blade flat against your cheek, then raise the spine by roughly twice the thickness of the blade to find the angle. Shallower and the edge skates over the hair; steeper and it digs in and cuts. Use light pressure, let the razor’s weight do the work, and keep the skin stretched taut with your free hand.
How do I stop a Damascus straight razor from rusting?
After every shave, rinse the blade under hot water, then dry it completely — including the pivot area — before applying a thin coat of mineral oil or a specialist blade oil. Store the razor somewhere dry rather than the humid bathroom cabinet. High-carbon Damascus steels such as 1095 and 15N20 take a superb edge but corrode quickly if left damp.