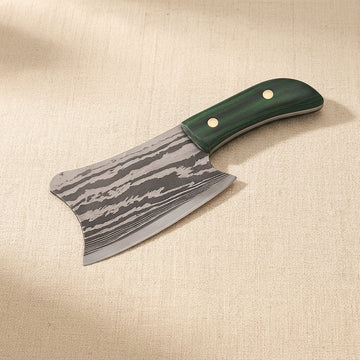
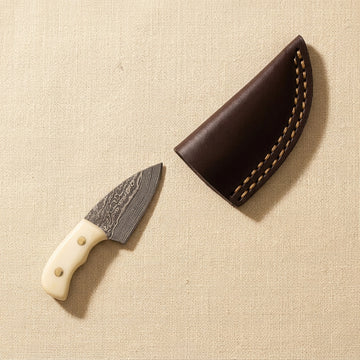
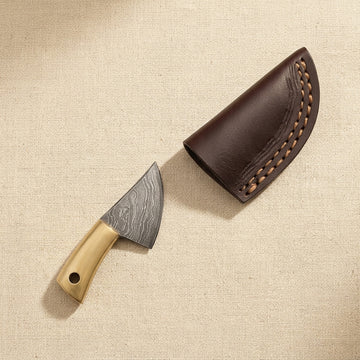
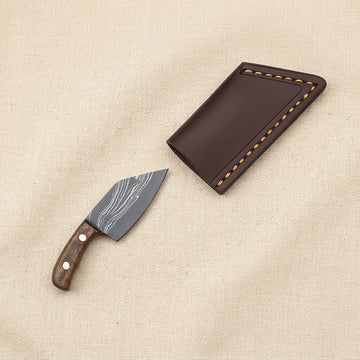
Quick answer: Sharpen Damascus knives by hand on water stones only — a 1000/3000/8000-grit progression at a consistent 17–20° per side suits most EDC and utility blades — then finish on a leather strop with green compound. Never use a power grinder or belt sander: the heat ruins the temper and erases the etched pattern. Strop regularly to postpone sharpening.
Damascus Knife Sharpening: A Professional's Guide
A Damascus steel knife is more than just a tool; it is a significant investment in performance and craftsmanship. The distinctive, layered patterns are the result of forge-welding different types of steel, creating a blade that is both hard and resilient. But like any high-performance edge, it will eventually dull. The question that stops many owners in their tracks is how to restore that razor edge without destroying the beautiful, intricate pattern they paid for.
Sharpening a Damascus blade is not a dark art, but it does demand precision, the right tools, and a clear understanding of the process. Get it wrong, and you risk more than just a dull knife; you can permanently damage the etch and the temper of the steel. Get it right, and you will maintain a peerless cutting tool for a lifetime. This guide is for the professional and the serious enthusiast who respects their tools enough to maintain them correctly.
When to Sharpen vs. When to Strop
The first step in blade maintenance is diagnosis. You do not need to bring out the whetstones every time your knife feels a little less keen. Over-sharpening is a common mistake that needlessly removes metal and shortens the life of your blade. Understanding the difference between a rolled edge and a truly dull edge is critical.
A knife edge, at a microscopic level, is incredibly thin. Through normal use, this thin apex can bend or 'roll' over to one side. The knife feels dull because the sharpest point is no longer making contact with the material you are cutting. It has not been abraded away; it is just misaligned. This is where a strop comes in. Stropping realigns this rolled edge, burnishing it back into a straight, sharp apex. It is a maintenance task, not a repair job. If you strop your knife for a few passes after each heavy use, you will drastically reduce how often you need to sharpen it.
Sharpening, on the other hand, is the process of abrading metal away to create a new, sharp apex. You sharpen when the edge is genuinely worn down, chipped, or when stropping no longer brings the edge back to life. If your knife can no longer cleanly slice paper and stropping does not help, it is time for the stones. For more on general upkeep, our Damascus daily-care guide covers cleaning and oiling.
Choosing Your Sharpening Kit
A consistent, repeatable sharpening process relies on good quality, appropriate tools. For Damascus steel, we are exclusively talking about manual methods. Power tools are off the table, for reasons we will cover later.
Whetstones: The Professional's Choice
Whetstones, or sharpening stones, are the foundation of any professional sharpening setup. They come in two main types: oil stones and water stones.
- Oil Stones: Traditionally made of natural materials like Novaculite (Arkansas stones), these are hard, slow-cutting, and require oil as a lubricant to float away the metal particles (swarf). They are durable but can be messy and cut less aggressively than modern water stones.
- Water Stones: Typically made from synthetic aluminium oxide or silicon carbide abrasives in a clay binder, these are the modern standard for high-carbon and complex steels like Damascus. They cut faster, come in a vast range of grits, and use water for lubrication. Water is cleaner, cheaper, and more effective at clearing swarf than oil. For sharpening Damascus, water stones are the recommended choice. They offer a better feel and faster results without excessive heat buildup.
Grit Progression Explained
Water stones are graded by their 'grit' number, which indicates the coarseness of the abrasive. A lower number means a coarser stone that removes metal quickly, whilst a higher number means a finer stone that polishes the edge. A typical professional progression for taking a dull knife to a razor-sharp finish involves several stages.
- Coarse (200-600 Grit): This is for repairs. A 400-grit stone is perfect for fixing small chips or for 're-profiling'—changing the angle of the bevel on a factory edge. You will only use this stone when necessary, not for routine sharpening.
- Medium (800-2000 Grit): The workhorse stone. A 1000-grit stone is the starting point for most routine sharpening jobs on a dull-but-undamaged blade. It is coarse enough to create a new apex efficiently but fine enough not to leave deep scratches.
- Fine (3000-6000 Grit): This is the refining stage. A 3000-grit stone removes the scratches left by the 1000-grit stone and begins to polish the edge to a mirror-like finish. The edge becomes significantly sharper and more durable at this stage.
- Finishing (8000+ Grit): For the ultimate polished, razor-sharp edge. An 8000-grit stone takes the refinement to the next level. This is less about sharpening and more about polishing the bevel to a state of extreme smoothness, reducing drag during cuts. For most professional uses, this is the final stone before stropping.
Leather Strops and Compound
A leather strop is a non-negotiable final step. It performs two functions: deburring and polishing. After using even an 8000-grit stone, a tiny, microscopic 'burr' of metal can remain on the edge. The strop removes this fragile wire, leaving a clean, strong apex. When loaded with a micro-abrasive polishing compound, it also polishes the edge to a level of sharpness that stones alone cannot achieve. Green chromium oxide compound is the standard for a terrifyingly sharp final edge. You can learn more about the different types in our guide where polishing compounds are explained in detail.
The Sharpening Process: A Step-by-Step Guide
With your kit assembled, it is time to begin. Work methodically and patiently. Rushing is the enemy of a good edge.
1. Preparation
Before you start, prepare your stones and workspace. Most water stones require soaking in water for 5-15 minutes before use—they are ready when they stop releasing air bubbles. Some 'splash-and-go' stones only need a quick spray of water. Always check the manufacturer's instructions. Set up on a stable, flat surface. A non-slip mat under your stone holder is essential for safety and consistency.
2. Finding and Holding Your Angle
The angle at which you hold the blade to the stone determines the characteristics of your edge. A lower angle gives a sharper but more fragile edge, while a higher angle gives a more durable but less keen edge. Consistency is everything. Holding a stable angle throughout the process is more important than the exact angle you choose.
- 15° Per Side: Primarily for Japanese-style kitchen knives used for delicate slicing of soft materials. Very sharp, but fragile.
- 17-20° Per Side: The sweet spot for an Everyday Carry (EDC) folding knife or general-purpose fixed blade. This offers an excellent balance of slicing performance and edge durability. We recommend starting here for most Damascus pocket knives.
- 22-25° Per Side: For heavy-use outdoor, bushcraft, or survival knives. This creates a very strong, robust edge that can withstand chopping and harder work without chipping, sacrificing some slicing finesse. Our Knives, Axes & Razors buyer guide discusses edge geometry in more detail.
To find your angle, you can use a permanent marker to colour in the bevel of the knife. After a few light strokes on the stone, inspect the bevel. If the marker is removed only at the very apex, your angle is too high. If it is removed only at the 'shoulder' of the bevel, your angle is too low. If the marker is removed evenly across the whole bevel, your angle is perfect. For beginners, a simple angle guide that clips onto the spine of the knife can be a huge help in building muscle memory.
3. The Sharpening Strokes
The goal is to work through your grit progression, creating a 'burr' on each side of the blade with each stone before moving to the next.
- Start with your chosen stone (e.g., 1000-grit for a dull knife). Place the knife on the stone at your desired angle. Use smooth, even strokes, moving the blade from heel to tip across the stone as if you were trying to slice a very thin layer off its surface. Maintain constant, light pressure.
- Raise a burr. After a number of strokes on one side, you need to check for a burr. This is a tiny ridge of metal that forms on the opposite side of the edge you are working on. You can feel it by gently running your fingernail off the edge, from the spine towards the apex. It will feel like a tiny, rough lip. Once you can feel a consistent burr along the entire length of the blade, it is time to flip the knife over.
- Repeat on the other side. Sharpen the second side until you raise a burr on the first side. The key is to use an equal number of strokes on each side to keep the bevel symmetrical.
- Progress to the next grit (e.g., 3000-grit). Move to your finer stone. The goal now is not to raise a large burr but to refine the edge and remove the scratches from the previous stone. Use lighter pressure and alternating strokes—one on the right, one on the left. This helps to reduce the burr size and centre the edge.
- Continue to your finishing stone (e.g., 8000-grit). Repeat the process with even lighter pressure. Your strokes should be gentle, polishing the edge to a mirror finish.
4. Deburring and Checking for Sharpness
After the final stone, you may have a very small micro-burr left. You can remove this with a few, very light, edge-trailing strokes on the stone, or by drawing the edge through a piece of soft wood. Now, test the sharpness. A sharp knife should cleanly slice through printer paper with minimal effort. It should not snag or tear the paper.
The Final Polish: Stropping for a Razor Finish
Stropping is the final 10% of the process that makes 90% of the difference. It takes a sharp edge and makes it truly keen.
Applying Compound
Take your bar of green polishing compound and lightly rub it onto the smooth leather side of your strop. You do not need to cake it on; a light, waxy layer is sufficient. It should look like you have coloured it in with a crayon.
Correct Stropping Technique
The most important rule of stropping is to always use an edge-trailing stroke. This means you drag the blade away from the cutting edge, with the spine leading. Never push the blade into the leather edge-first, as this will slice your strop to ribbons. Use the same angle you sharpened at, or just a fraction higher. Perform 10-20 alternating strokes per side with light pressure. The blade should glide smoothly.
The Cardinal Sin: Why Power Sharpening Is Out
Let's be clear: never use a high-speed grinder or belt sander on a Damascus knife. These tools generate immense heat very quickly. This heat will instantly ruin the temper of the thin steel at the edge, making it soft and unable to hold an edge. Worse, the aggressive abrasion will strip away the etched pattern of the Damascus layers, permanently destroying the aesthetic you paid a premium for. The pattern is revealed by an acid-etching process; it is not infinitely deep. A power grinder will erase it in seconds.
Even motorised water-cooled systems, whilst better on the heat front, are still too aggressive for preserving the delicate etch on a fine Damascus blade. Stick to hand sharpening on whetstones. It is the only professional method that gives you the control needed to protect your investment. If you've just invested in a new blade, this is a key lesson from our Damascus knife buyer's guide.
UK Professional Sharpening Services
What if your knife is badly damaged, or you simply do not have the time or confidence to sharpen it yourself? A professional sharpening service is a valid option, but you must choose carefully.
When to Call in a Pro
If you have a blade with significant chips, a broken tip, or a completely misshapen bevel, a professional can save you a lot of time and frustration. They have the experience and tools to perform major repairs without damaging the blade.
What to Ask For
Do not just send your knife to any 'key cutting and sharpening' shop. You need a specialist. When you contact them, be explicit:
- State that the knife is Damascus steel and the pattern must be preserved.
- Specify that you require hand sharpening on whetstones only.
- Confirm that no power tools or high-speed grinders will be used.
- Discuss the final edge angle you want.
A reputable service will understand these requirements and be able to confirm their process. Expect to pay between £15 and £30 per knife, depending on the size and condition. Turnaround is typically a few days to a week, plus postage time.
A Note on UK Postage
Posting sharp blades within the UK requires care. Carriers have their own rules for sending bladed articles, so check your carrier's current guidance before posting. Package the knife securely so it cannot pierce the outer packaging. Inform the sharpening service of the inbound package so they can receive it safely.
Key Takeaways
- Strop for maintenance, sharpen for repair. Regular stropping realigns the edge and reduces the need for sharpening.
- Use water stones for Damascus. They cut efficiently and cleanly without excessive heat. A 1000/3000/8000 grit progression is ideal.
- Angle consistency is crucial. A 17-20° angle is a good all-round choice for most Damascus EDC and utility knives.
- Never use power grinders. They will destroy the temper and erase the etched pattern of your blade.
- Strop with compound as the final step. Use an edge-trailing motion to deburr and polish the edge to razor sharpness.
- Vet professional services carefully. Insist on hand sharpening on whetstones to protect your investment.
Maintaining a Damascus steel knife is a rewarding skill that connects you more deeply with your tools. By using the correct techniques and high-quality whetstones, you can ensure your blade performs at its peak for years to come, with its beautiful pattern fully intact. It is a process that demands patience, but the results speak for themselves. For those looking to add a new piece to their collection, or to replace a well-loved tool, see our Damascus Knives collection, part of the wider Damascus Knives, Axes & Razors range.
Related guides
- D2 Tool Steel Knives: What UK Makers & Buyers Should Know
- Damascus Axes & Hatchets: A UK Buyer's Guide
Frequently asked questions
What whetstones do I need to sharpen a Damascus knife?
Synthetic water stones are the recommended choice: a 1000-grit stone for routine sharpening, 3000-grit to refine, and 8000-grit to polish, with a coarse 400-grit kept only for chip repairs and re-profiling. Water stones cut faster than oil stones without excessive heat, and a leather strop loaded with green compound delivers the final razor edge.
Can I use an electric sharpener or grinder on Damascus steel?
No. High-speed grinders and belt sanders generate intense heat that instantly ruins the temper of the thin edge, and their aggressive abrasion strips the acid-etched pattern, which is not infinitely deep. Even water-cooled motorised systems are too aggressive. Hand sharpening on whetstones is the only professional method that protects both edge and pattern.
What angle should I sharpen a Damascus knife at?
17–20° per side is the sweet spot for most Damascus EDC and general-purpose blades, balancing slicing performance with edge durability. Reserve 15° for delicate Japanese-style kitchen slicing and 22–25° for hard-use outdoor knives. Consistency matters more than the exact number — use the marker-pen trick or a clip-on angle guide to check.