Quick answer: Buy all three solder grades from day one — Hard (~745°C), Medium (~720°C) and Easy (~705°C) — because jewellery is built by stepped soldering, highest-melting first. For a first torch, choose a Cooks/Sievert-style blowtorch (£30-£50): butane micro-torches can't even heat a 2 mm ring band. Add flux, a charcoal block and a citric-acid pickle pot.
Let’s be honest. Soldering is the great gatekeeper of silversmithing. It’s the skill that separates dabbling from doing, the technique that transforms simple wire and sheet into something structural, wearable, and whole. Many a promising jeweller has been put off by a melted bezel or a stubborn ring seam that refuses to close. But here’s the secret from our bench to yours: once you understand the ‘why’ behind the process, the ‘how’ becomes second nature. Master a clean, invisible ring band join and a confident bezel, and you’ve unlocked about 90% of jewellery design. Everything else – from hollow forms to complex settings – is just a variation on that theme. This guide is here to demystify the process, cut through the noise, and get you flowing solder with confidence.
Solder grades: what Hard/Medium/Easy actually mean
Walk into any supplier and you'll see silver solder sold in three main grades: Hard, Medium, and Easy. To a beginner, this can seem confusing. Are some joins harder than others? Not quite. The names refer to the melting temperature, or more accurately, the ‘flow point’ of the solder. Understanding this is the absolute key to constructing anything more complex than a single join.
Silver solder isn't pure silver; it's an alloy of silver, copper, and zinc. The percentage of zinc determines the melting point – more zinc means a lower melting temperature.
- Hard Solder (Flow point: ~745°C): This has the highest silver content and therefore the highest melting point. Because it can withstand the most heat before flowing again, you always use Hard solder for the first join on a piece that will require subsequent soldering. It creates the strongest bond. Think of soldering a bezel cup onto a backplate for a pendant. This is your first constructional join, so you use Hard.
- Medium Solder (Flow point: ~720°C): This is your bench workhorse. It flows at a slightly lower temperature than Hard. You'll use this for the vast majority of your single-join work (like a simple ring band) or for the second join on a multi-part piece. For our pendant, after making the bezel/backplate unit with Hard solder, you would use Medium solder to attach the jump ring or bail. The heat required to flow the Medium solder won't be high enough to disturb your initial Hard join.
- Easy Solder (Flow point: ~705°C): As the name suggests, this has the lowest melting point. It’s used for the final join on a delicate or complex piece, where you absolutely cannot risk re-flowing your previous work. Imagine you’ve soldered a delicate granulation bead next to your bezel setting. You’d use Easy solder for that final touch, safe in the knowledge that your Hard and Medium joins will remain solid. It's your get-out-of-jail-free card for that last, nerve-wracking step.
Why you must order ALL THREE from day one: It’s a false economy to start with just one grade. The entire principle of constructing jewellery relies on ‘stepped’ or ‘sequential’ soldering. You build your piece in stages, starting with the highest temperature solder and working your way down. Trying to solder a jump ring onto a bezel with the same grade of solder you used to make the bezel is a recipe for disaster; you'll end up melting the whole thing into a puddle. Buying a small amount of all three grades from the outset will save you an immense amount of frustration, time, and wasted silver. It is the professional way to work.
Flux: borax cone vs paste vs Auflux
Before solder can flow, you need flux. But what does it actually do? When you heat sterling silver, the copper content in the alloy eagerly reacts with oxygen in the air, creating a stubborn black layer of cupric oxide, also known as firescale. Solder will not flow over this oxide layer. Flux is a chemical agent that, when heated, creates a glassy, oxygen-proof barrier on the surface of the metal. It keeps the join clean at a microscopic level, allowing the solder to be drawn into the seam through capillary action. No flux, no flow. It’s that simple.
-
Borax Cone and Dish: The traditional, time-honoured method. You grind the cone of solid borax in a ceramic dish with a few drops of water to create a creamy paste. This is what jewellers have used for centuries.
Pros: Extremely cheap, a single cone can last for years, you have complete control over the consistency. It’s a fantastic skill to learn.
Cons: It takes 30 seconds to prepare, which can feel like a chore when you’re in the zone. -
Paste Flux (e.g., Easy-flo): This is the most common choice in classrooms and workshops today. It’s a pre-mixed flux and is ready to use straight from the pot.
Pros: Incredibly convenient, consistent, and easy for beginners to apply.
Cons: Can dry out if the lid is left off, and some formulations contain fluorides which require excellent ventilation. More expensive over time than a borax cone. -
Auflux: This is a liquid flux, often yellow or green, that is painted on with a brush. It’s known as a ‘self-pickling’ flux.
Pros: Provides excellent protection against firescale over the entire piece, not just the join. It’s fantastic for delicate work and leaves a very clean surface.
Cons: It’s more expensive and its watery consistency can be tricky for beginners to control – it can run away from the join area if applied too heavily.
Our advice? Start with a borax cone and dish to understand the fundamentals. However, for day-to-day work, the convenience of a good quality paste flux is undeniable. Many experienced jewellers keep both on their bench.
Torches: the real beginner dilemma
Choosing your first torch can feel like a huge decision, fraught with technical jargon and a wide range of price points. The truth is, the torch you need depends entirely on the scale of the work you intend to do. The key is having enough thermal energy (heat) to raise the entire piece of metal to the solder's flow temperature.
-
Butane Micro-torch (£20-£40): These are small, handheld torches often sold under brands like Dremel or Proxxon; Toolsmith does not currently sell torches. They are powered by butane gas canisters, like those used for refilling lighters.
Good for: Very small jobs. Think jump rings, fine chain repair, earring posts, and tiny bezel settings.
The reality: Whilst cheap, their heat output is very limited. You will struggle to solder even a standard 2mm thick silver ring band, as the metal will dissipate the heat faster than the torch can supply it. It’s a frustrating experience known as ‘chasing the heat’. A false economy if you’re serious about making rings or pendants. -
Cooks Blowtorch / Sievert-style (£30-£50): This is the workhorse of most UK start-up benches. It consists of a burner head that screws directly onto a disposable canister of butane/propane mix gas (available from most hardware shops).
Good for: Almost everything a beginner or intermediate jeweller will tackle. It has enough power for rings, pendants, small bangles, and bezel settings up to a decent size (approx. 3" square of silver).
The reality: This is the undisputed sweet spot for value and performance. It provides a big, bushy flame perfect for evenly heating your work. For the price, its capability is astonishing. This should be your first torch. -
Oxy-Propane / Smith Little Torch Setup (£150-£400+): This is the professional studio kit. It uses two separate gas tanks: a fuel gas (propane) and an accelerant (oxygen). Mixing the two allows for a huge range of flame sizes and temperatures, from a tiny, precise needle flame to a large, hot flame for casting.
Good for: Everything, from micro-fine work to large hollow forms and melting metal for casting. Essential for working with gold and platinum.
The reality: This is a significant investment, involving the torch kit itself plus ongoing rental or purchase of gas bottles from suppliers like BOC. It’s overkill for a beginner, but it’s what you’ll graduate to when you start working on larger, more ambitious pieces.
Soldering blocks: charcoal vs magnesia vs solderite
Your soldering happens on a fireproof block. Its job is twofold: to provide a safe surface and, crucially, to reflect heat back up into your workpiece, helping you reach soldering temperature more efficiently. Different blocks have different properties.
-
Charcoal Block: The classic choice. A dense, black block of compressed charcoal.
Why we love it: It reflects heat brilliantly. As it heats up, it consumes oxygen around your piece, creating a ‘reducing’ atmosphere that significantly minimises firescale. You can also easily carve into it or pin things down. A clean solder join on a fresh charcoal block is one of life’s simple pleasures.
The catch: It is a consumable. It slowly burns away with use and will eventually crack and fall apart. But they are inexpensive and the benefits are worth it. -
Magnesia Block: A soft, white, chalky-feeling block.
Why it's useful: It’s very soft, making it perfect for jobs where you need to pin down multiple components with T-pins.
The catch: It doesn’t reflect heat nearly as well as charcoal and can act as a heat sink, drawing warmth away from your piece. It also crumbles easily. -
Solderite Board: A hard, durable, man-made ceramic board.
Why we love it: It is perfectly flat and stays that way, making it ideal for laying out complex pieces that need to be perfectly aligned. It’s extremely durable and can withstand huge amounts of thermal shock.
The catch: Like magnesia, it’s a poor heat reflector. You often need to raise your work up on a tripod or binding wire to get heat underneath it.
For your first setup, a charcoal block is the best all-rounder. Add a solderite board later when you need a perfectly flat reference surface.
Safety setup
This part is not optional. Fire and chemical fumes are inherent to soldering, but they are perfectly manageable with a sensible, professional setup. Do not cut corners here.
- Ventilation: At an absolute minimum, you must work next to an open window. Fumes from burning flux and pickle are irritants. A proper extractor fan is a wise investment for any permanent bench.
- Fire-safe Mat: Your soldering block must sit on a completely fireproof surface. A large, thick steel or aluminium sheet is ideal. A large ceramic floor tile also works. Never solder directly on a wooden bench.
- Flooring: Do not solder in a room with carpet. A stray spark or a dropped piece of hot metal can cause a fire in seconds. Work on concrete, tiles, or lino flooring.
- Quench Bowl: Have a large, deep bowl of cold water right next to your soldering area. A Pyrex casserole dish is perfect as it won't crack from thermal shock. This is for quenching hot metal and tools.
- Pickle Pot: Your pickle solution (see below) must be kept in a designated, lidded pot, clearly labelled. Keep it away from your steel tools.
- Fire Extinguisher: Keep a fire extinguisher suited to your workshop to hand, and make sure you know how to use it. Our bench fire safety guide covers which type to choose.
- Personal Safety: Tie back long hair. Wear safety glasses – solder can spit. An apron made from leather or cotton is a good idea.
The 8-step first ring-band join
This is it. The fundamental process. We’ll make a simple silver ring band. Follow these steps precisely and you will succeed.
- File ends flat: Cut your silver wire to length. Now, using a number 2 cut flat file, file both ends of the wire perfectly flat and square. Hold the file steady and bring the wire to it. Check your progress constantly. When you bring the two ends together, there should be absolutely no gap. No light should shine through. This perfect fit is 50% of a successful join. Solder is a bonding agent, not a filler.
- Join the seam: Form the wire into a ring shape. It’s easiest to make a ‘D’ shape first, then use flat or parallel pliers to bring the two filed ends together. They should meet with a satisfying ‘click’. The tension of the metal should hold the seam tightly closed.
- Flux liberally: Using a small brush, paint your chosen flux all over the join area – on the outside, on the inside, and on the top and bottom. Don’t be shy. A well-fluxed piece is a happy piece.
- Cut 2-3mm solder pallions: A pallion is simply a tiny snippet of solder. Using an old pair of snips (solder will blunt your good ones), cut two or three tiny (1mm square) pieces of Medium silver solder.
- Place pallions across the seam: Use a pair of fine-tipped, non-serrated tweezers to pick up a pallion. A good trick is to dip the tip of your flux brush in flux, touch the pallion to pick it up, and then place it precisely. Place one or two pallions on the inside of the ring band, right on top of the seam. Placing them inside results in a much cleaner finish on the outside.
- Warm the whole piece first: This is the most common beginner mistake. Do not point your torch directly at the solder. Solder flows towards heat. You must heat the entire ring band evenly. Use a large, soft, ‘bushy’ flame and move it constantly around the whole ring. You are bringing the entire piece up to temperature.
- Bring torch to the seam when flux goes glassy: Watch the flux. It will first bubble and boil, then turn a crusty white. As you continue to heat, it will suddenly turn clear and liquid, like glass. This is your cue! The metal is now just below the solder's flow point. At this moment, focus your flame on the metal on the opposite side of the ring from the solder. This will draw the solder right through the seam. You will see a bright silver flash as it flows. As soon as you see that flash, pull the torch away immediately. You’re done.
- Quench, pickle, and inspect: Let the ring air cool for 20-30 seconds until the red glow has completely faded. Never quench red-hot silver. Pick it up with brass tweezers and drop it into your water bowl – it will hiss. Then, transfer it from the water to your warm pickle pot. Leave it until all the black oxide has disappeared, revealing clean, white silver. Rinse it thoroughly and inspect your perfect, seamless join.
Pickle: Sparex vs citric acid
Pickle is a mild acid solution used to chemically remove flux residue and the copper oxides (firescale) that form during heating. You must use brass or plastic tweezers for your pickle pot; any steel (including binding wire) will contaminate the solution and copper-plate all your silver.
- Sparex No. 2 (Sodium Bisulphate): This has been the industry standard for decades. It's a granular powder that you mix with warm water. It works quickly and effectively. However, it is a hazardous chemical that requires careful handling, good ventilation, and specific disposal procedures.
- Citric Acid: This is the modern, safer, and more environmentally friendly alternative that we strongly recommend. It’s the same stuff used in food and drink. You can buy it cheaply in bulk from home-brewing suppliers or online. It works almost as well as Sparex, especially when used warm in a dedicated mini slow-cooker (which acts as a perfect, thermostatically controlled pickle pot). For any home studio or teaching environment, the safety benefits of citric acid are overwhelming.
First ten common mistakes
We’ve all made them. Learn to recognise them, and you’ll progress much faster.
- A gappy join: Trying to fill a gap with solder. It won't work. File it right first.
- Dirty or greasy metal: Solder is repelled by oil from your fingerprints. Clean your metal before you start.
- Not enough flux, or burnt-off flux: If you heat the piece for too long, the flux can burn away. If you see black oxides forming, stop, pickle, and start again.
- Overheating: The dreaded meltdown. A reticulated surface or a puddle of silver means you held the heat on for too long after the solder flowed.
- Underheating: The solder ‘balls up’ into a little sphere but doesn’t flow. The piece isn't hot enough. Warm the whole piece more.
- Heating the solder, not the metal: A classic. The solder melts but just sits on the surface of the colder metal. Remember: heat the piece, and let the hot metal melt the solder.
- ‘Tombstoning’: When a ring band join is heated from one side, the solder flows on that side but not the other, pulling the join open like a drawbridge. Heat the whole piece evenly.
- Using steel tweezers in the pickle: This creates a chemical reaction that flash-plates every piece of silver in the pot with a layer of pink copper. It’s a pain to remove. Brass or plastic tweezers only.
- Quenching too soon: Plunging a glowing-hot piece into water can cause thermal shock, which can crack brittle solder joins. Let it cool for a moment first.
- Using the wrong solder grade: Trying to make a second join with Hard solder right next to your first Hard solder join. It’s a race you will lose. Use stepped soldering every time.
UK-stocked: fast dispatch
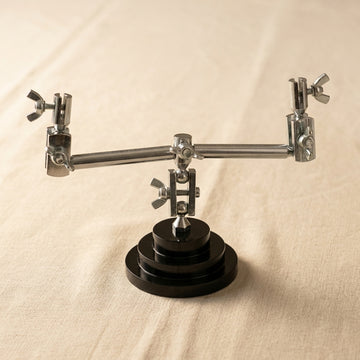
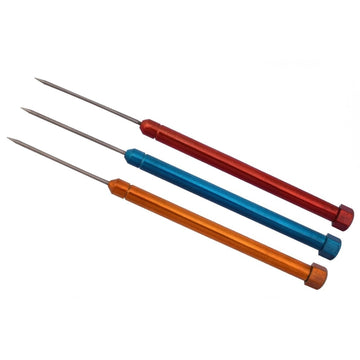
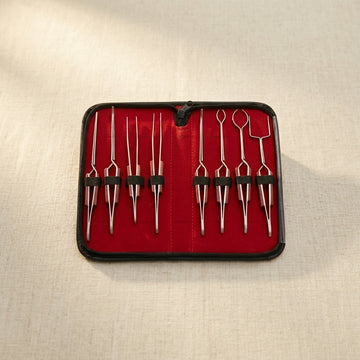
Feeling ready to light the torch? Toolsmith stocks soldering bench tools such as soldering and cross-lock tweezers, third hands, titanium soldering picks, torch hook holders and a soldering tripod; we do not currently sell torches, solder or soldering blocks. Everything we sell ships from UK stock, and we aim to dispatch orders placed before 2pm UK time, Monday to Friday, the same working day. Welcome to the bench.
Related guides
- Setting Up a Jewellery Bench on a Student Budget (UK, 2026)
- UK Hallmarking Guide for Jewellery Makers (2026)
- Jewellery Soldering Torches: Choosing Your First Bench Torch
- Jeweller's Tweezers & Clamps: Soldering, Locking & Diamond Types
- Soldering Bench Accessories: Torch Stands, Third Hands & Titanium Picks
- Shop all Soldering Tools
- Goldsmith's Soldering: Yellow, White & Rose Gold Without Pitting
- Bench Fire Safety: A UK Silversmith's Essential Guide
Frequently asked questions
What torch should I buy for soldering silver as a beginner?
A Cooks blowtorch or Sievert-style head on a butane/propane canister (£30-£50) is the sweet spot for a UK start-up bench — enough power for rings, pendants, small bangles and bezel settings. Butane micro-torches leave you 'chasing the heat' on anything bigger than jump rings, and oxy-propane setups (£150-£400+) are overkill until you tackle larger work or gold.
What's the difference between Hard, Medium and Easy silver solder?
Melting temperature. Hard flows at about 745°C, Medium about 720°C and Easy about 705°C. You build a piece in stages — Hard for the first constructional join, Medium for the next, Easy for the final delicate join — so each new join flows without re-melting the previous ones. Starting with only one grade is a false economy.
Why won't my solder flow into the join?
Usually preparation or heating. The join must be gap-free — solder is a bonding agent, not a filler — and the metal clean and well fluxed. Then heat the whole piece evenly rather than pointing the flame at the solder: solder flows towards heat, and the cue is the flux turning glassy-clear, at which point solder is drawn through the seam.